Record a New Clip Directly Into Your Existing Project
Append brand-new screen recordings directly to your open project. Record, stop, and see your new clip appear instantly on the timeline.
The workflow up until now: finish recording, open the editor, realize you need one more clip, open a brand-new project, record it, export it, import it back into your edit. Our latest update cuts that down to one step — click Screen in the timeline, record, come back, and the new clip is already waiting at the end of your timeline.
The Problem This Solves
Every long-form demo, tutorial, or walkthrough has the same pattern: you record the first section, start editing, realize you skipped something, and need to capture it. Previously, that meant abandoning the current edit, opening a new project, recording, exporting, and importing the result as a video file. Possible, but the friction was real.
This update makes the recording pipeline aware of its own project context. Instead of always starting fresh, it can append a new recording segment to an existing project — preserving everything you've already built.
How It Works
Open any project in the editor. Click the + button on the timeline toolbar and choose Screen Recording.
A confirmation dialog appears: "Record new clip — editor will close and reopen automatically." This is intentional. The editor saves your current state, closes cleanly, and hands control to the familiar recording flow — the same Source Selector and HUD you already know from starting a new project.
Record your clip. When you stop, the new recording is automatically appended to the project — no manual import, no extra steps. The editor reopens and you're back where you left off, with the new segment waiting at the end of the timeline.
Your Editor State Is Saved and Restored
Closing the editor to record would be annoying if it meant losing your place. We've introduced editor session persistence — before closing, Screenify saves a snapshot of your current state to an editor-session.json file inside the project bundle.
What gets saved:
| State | Preserved |
|---|---|
| Selected clip | ✅ |
| Open properties panel tab | ✅ |
| Zoom region / callout selection | ✅ |
| Timeline scroll position | ✅ |
| Timeline zoom level | ✅ |
| Playhead position | ✅ |
When the editor reopens after recording, it reads this file and restores your exact context — same clip selected, same panel open, same scroll position. You're dropped right back where you were, with the new clip appended at the end.

The session file is small, human-readable JSON, and silently ignored by older app versions — making it safely additive.
Source Selection Feels Identical to a New Recording
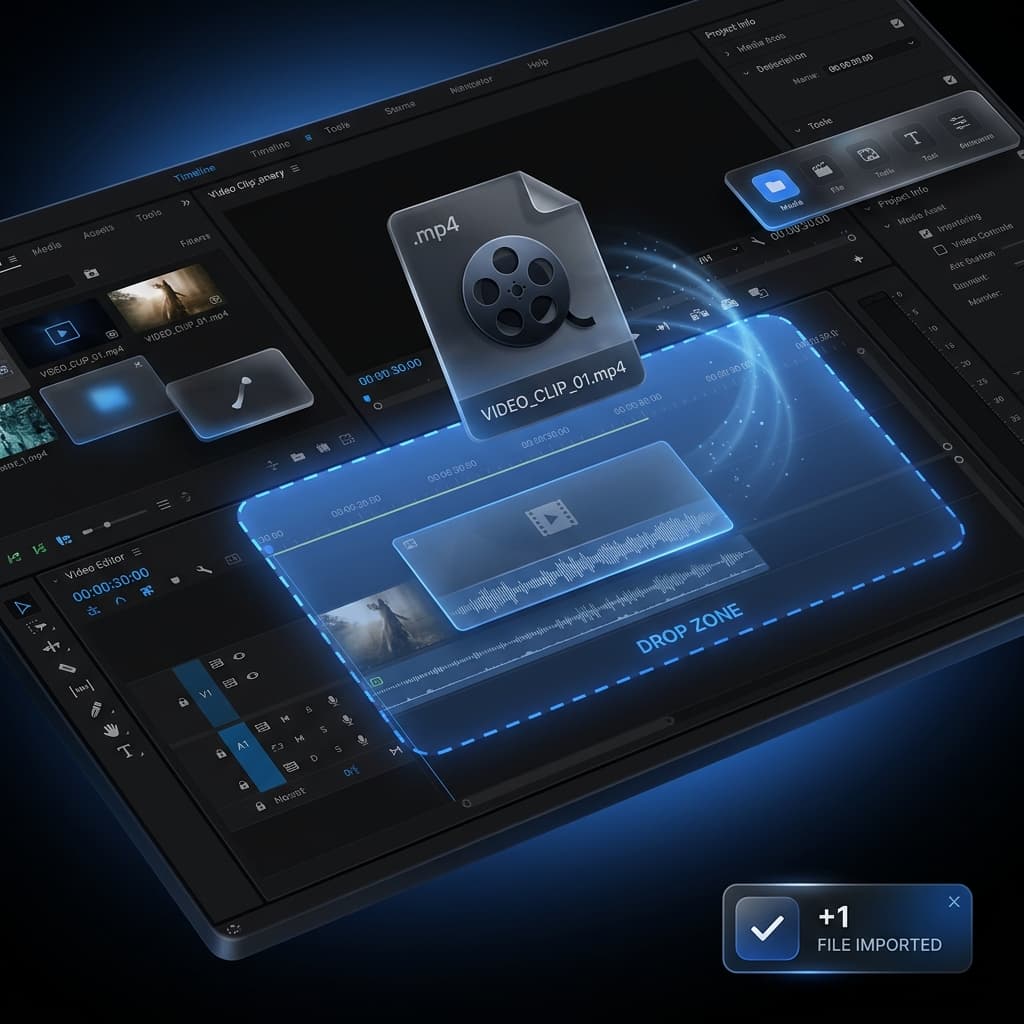
When the editor closes and the Source Selector appears, you're in the exact same flow as starting a fresh project. Choose your screen or window, pick your camera and mic settings, and hit record. The only difference you won't see: the backend is writing the new recording into your existing project folder instead of creating a new one.
The new recording lands in content/segments/segment-N/ — the same per-segment structure that Sprint 65 established for multi-segment projects — and gets the next available index automatically.
Dimension Validation: No Silent Failures
ffmpeg -c copy — the fast, lossless approach Screenify uses to merge segments — requires all recording segments to have identical dimensions. If you originally recorded at 1920×1080 and try to append a 1280×720 clip, the concat would fail with a cryptic error deep in the pipeline.
Screenify now catches this at the moment you click the record button in the HUD.
If the source you've selected doesn't match the project's original dimensions, you get an immediate, specific error: "Source 1280×720 doesn't match project 1920×1080. Pick the same window or display as your original recording."
The editor does not reopen. You stay in the HUD and can pick a different source and retry — no lost time, no restarting the flow.
Multi-Segment Audio Is Seamless
We've built the multi-segment audio foundation to handle this seamlessly. Our latest update appends to that same structure — the new segment's audio files sit in their own segment folder, and the engine handles the boundary transition at playback time.
The POC that informed Sprint 94's design validated this end-to-end: a manually assembled two-segment project played through the segment boundary with no audible click or pop through headphones. The concat approach is fast (a 24-second merge takes under 60ms) and lossless — no re-encoding happens.
Try Screenify Studio — free, unlimited recordings
Auto-zoom, AI captions, dynamic backgrounds, and Metal-accelerated export.
Works With Mixed-Media Projects
If your project already contains imported images or video clips, appending a new recording works exactly the same way. The existing segments stay exactly where they are. The pool of preloaded video elements for imported clips remains warm and doesn't need to be re-initialized after the editor reopens. Everything reloads from disk on editor mount — clean, deterministic, no state to manually reset.
Cancel or Crash — Nothing Is Lost
If you open the Source Selector and then cancel without recording, the editor reopens automatically and your project is exactly as you left it. Nothing was appended, no files were written.
If a crash occurs mid-recording, the partially-written segment folder is left in place but the project configuration files are never updated until the recording completes successfully. The next time you open the app, orphan folders are detected and cleaned up. Your project remains valid.
The atomic write sequence — segment files first, then meta, then config — ensures no half-state is ever saved to disk.
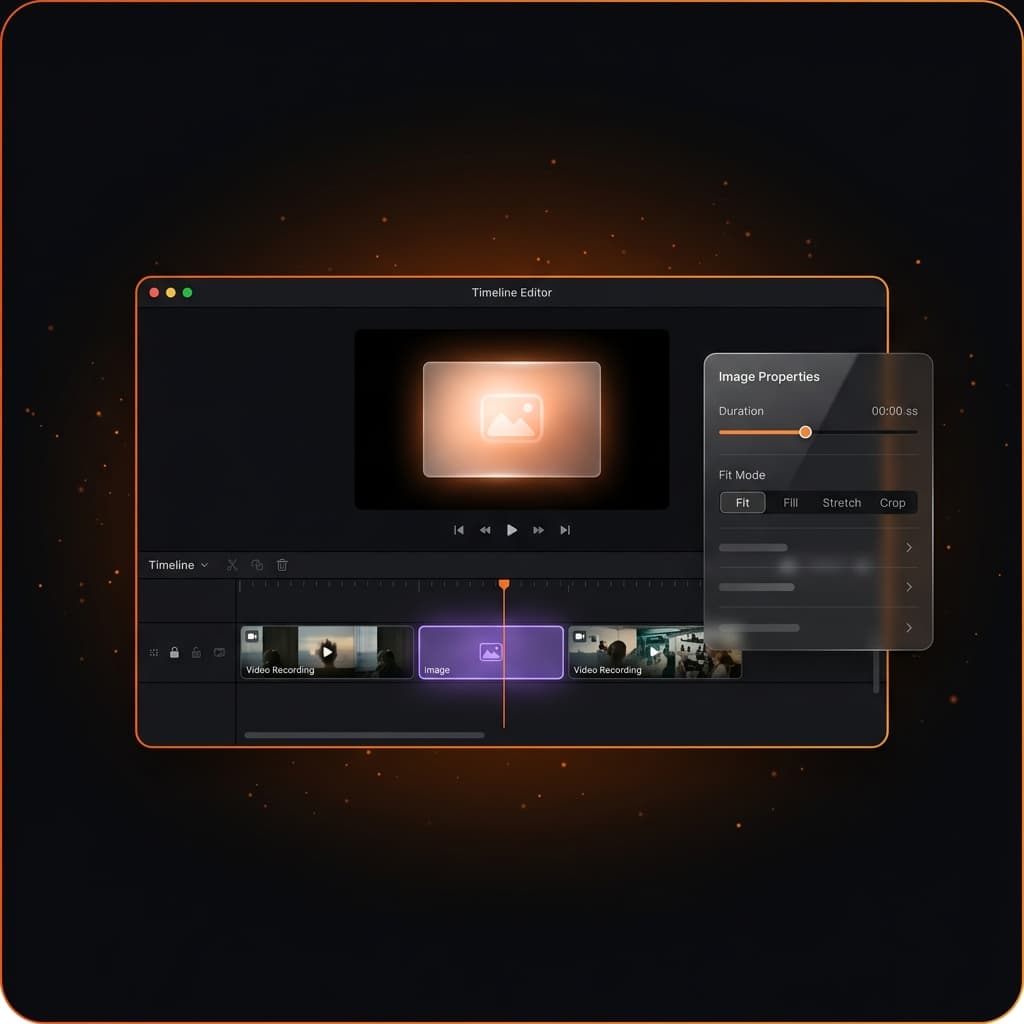
What This Looks Like on the Timeline
When the editor reopens after a successful append, the new recording segment appears at the far right of the timeline as a standard cyan clip — identical to any other recording segment. A "New clip added" toast confirms the append. The timeline scrolls to show the new segment so you can jump straight to editing it.
All the effects you know work immediately: add zoom regions, callouts, annotations, cursor effects, background changes. The new segment is fully in the project, not a foreign import.
This update completes our three-part media insertion story:
| Feature | What it added |
|---|---|
| Image Insertion | Insert images as timeline segments |
| Video Import | Import external videos as timeline segments |
| Record-to-Project | Record a new clip directly into the project |
All three use the same underlying multi-segment architecture. A project is now a collection of segments from any source — captured live, imported from disk, or both — arranged in any order on the timeline.
Try Screenify Studio — free, unlimited recordings
Auto-zoom, AI captions, dynamic backgrounds, and Metal-accelerated export.
Coming Next
Our next update focuses on in-editor trim handles for imported segments — drag the edges of any imported image, video, or recording clip directly on the timeline to trim without touching the Properties Panel.
Download Screenify Studio to try recording new clips directly inside your projects.
Try Screenify Studio
Record your screen with auto-zoom, AI captions, dynamic backgrounds, and Metal-accelerated export. Free plan, unlimited recordings.
Download Free


