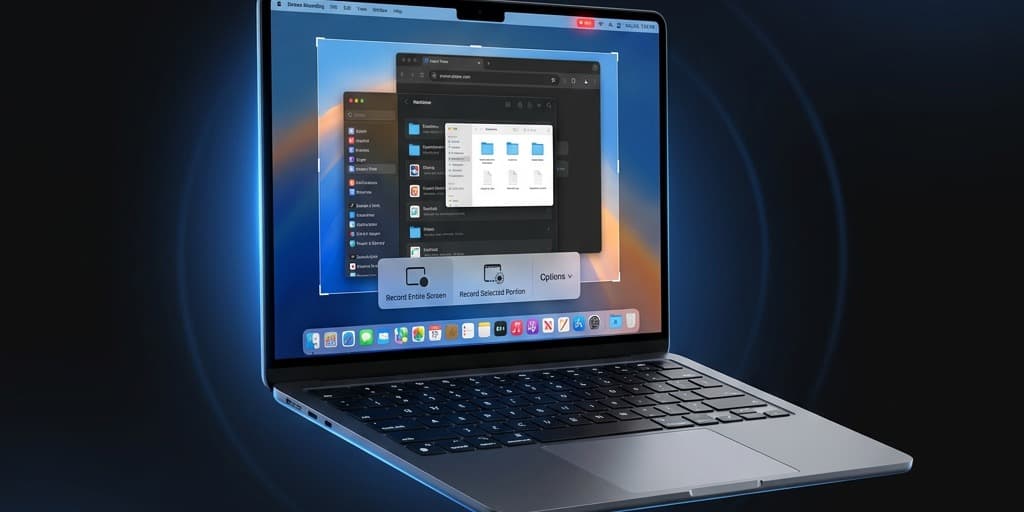
How to Screen Record on MacBook Air
Record your MacBook Air screen with 4 methods — plus tips for handling the fanless design, battery life, and display sizes.
The MacBook Air is the most popular Mac ever sold — and it records screen just fine. But its fanless design, base 8GB RAM, and 256GB SSD create specific constraints that don't exist on a MacBook Pro. Long recordings can thermal throttle the CPU. A 20-minute session eats battery faster than you'd expect. And that 256GB drive fills up quicker than most people realize when they're saving uncompressed video.
This guide covers four recording methods, with specific notes on what works (and what breaks) on MacBook Air hardware.
Quick Comparison
| Tool | Price | System Audio | Webcam | Editing | Air-Friendly |
|---|---|---|---|---|---|
| macOS Screenshot Toolbar | Free (built-in) | No | No | None | Best for battery |
| Screenify Studio | Free / Pro $9.99/mo | Yes | Yes | Auto-zoom, captions, backgrounds | Hardware-accelerated encoding |
| OBS Studio | Free (open-source) | Yes (via plugin) | Yes | None (record only) | High CPU usage — throttling risk |
| Screen Studio | $89 one-time | Yes | Yes | Auto-zoom, backgrounds | Moderate CPU usage |
MacBook Air Hardware Context
Before choosing a method, understand what you're working with.
Display Resolution
- 13" MacBook Air (M1/M2/M3): 2560 x 1664 — records at roughly 4.3 million pixels per frame
- 15" MacBook Air (M2/M3): 2880 x 1864 — records at roughly 5.4 million pixels per frame
Higher resolution means larger file sizes and more encoding work. If you're recording tutorials for YouTube at 1080p delivery, you're capturing at 2x+ the final output resolution on either model. Recording a specific area at 1920x1080 instead of full screen cuts file size and CPU load significantly.
Fanless Thermal Design
Every MacBook Air since the M1 has zero fans. The aluminum chassis is the heatsink. During sustained workloads, the M-series chip reduces clock speed to stay within thermal limits. Screen recording is a sustained workload — the hardware encoder runs continuously, and if you're also running the app you're recording, the combined load can trigger throttling within 10-15 minutes on warm days or soft surfaces.
RAM and Simultaneous Tasks
- 8GB — recording alone works fine. Recording while running Chrome with 20+ tabs, Figma, and Slack will cause memory pressure. macOS swaps to SSD, which slows everything and increases storage writes.
- 16GB — comfortable headroom for recording plus typical workflows.
- 24GB — overkill for recording, but useful if you're editing the recording immediately after in the same session.
Battery Impact
Screen recording drains roughly 15-25% per hour depending on the tool and whether you're recording full screen or a region. OBS uses significantly more power than the built-in tool due to software encoding. Tools that leverage Apple's hardware Media Engine (like Screenify Studio and the built-in recorder) are far more efficient.
Method 1: macOS Screenshot Toolbar (Built-in)
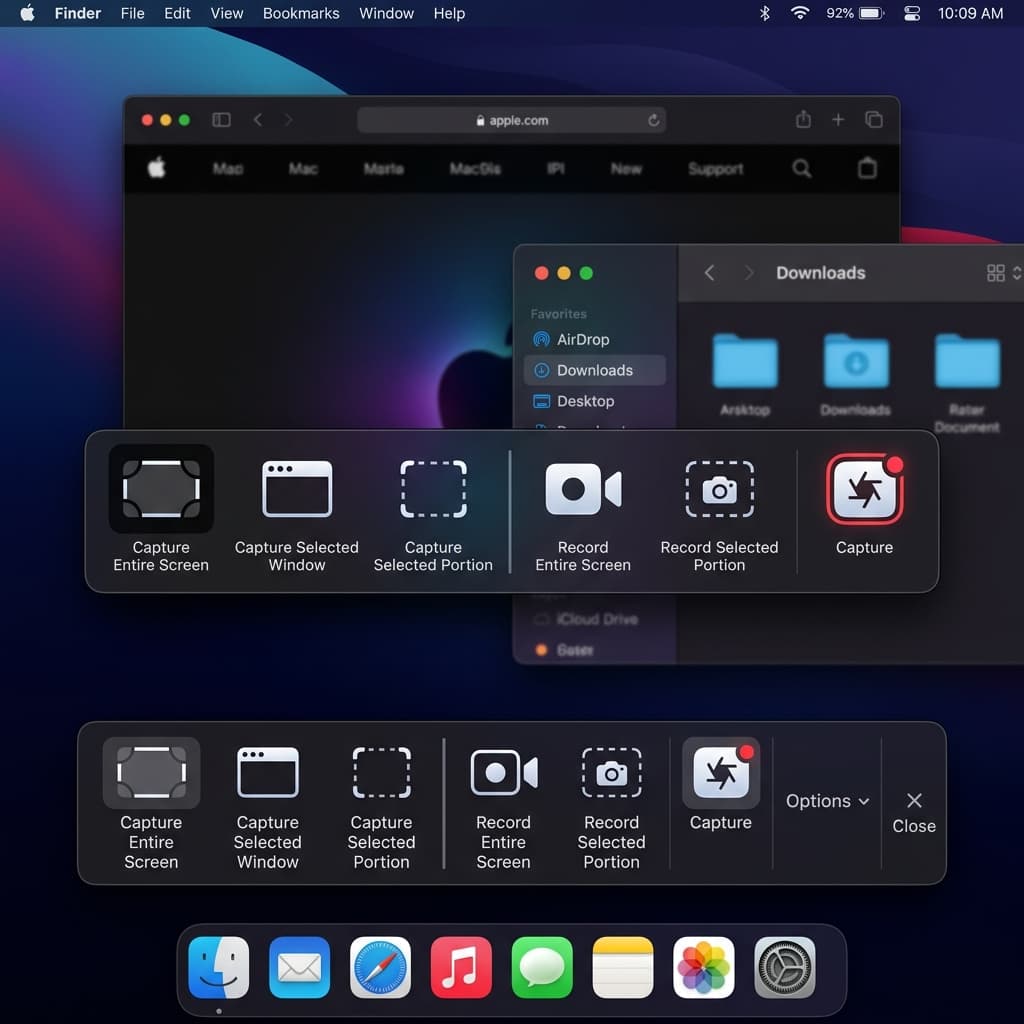
The lightest option. No download, minimal CPU usage, and it uses Apple's hardware encoder by default.
Steps
- Press ⌘ + Shift + 5 to open the Screenshot toolbar at the bottom of your screen
- Choose a recording mode:
- Record Entire Screen — captures your full 2560x1664 or 2880x1864 display
- Record Selected Portion — drag a rectangle to capture a specific region
- Click Options to configure:
- Save to — pick Desktop, Documents, or a custom folder. On a 256GB Air, consider saving to an external drive or iCloud folder
- Timer — 5 or 10 second countdown
- Microphone — select Built-in Microphone or an external device. The Air's built-in mic is acceptable for narration but picks up keyboard typing clearly since it sits directly above the keyboard
- Show Mouse Clicks — adds a dark circle on each click during playback
- Click Record or press Enter
- Stop with the ⏹ button in the menu bar or press ⌘ + Control + Esc
Air-Specific Notes
- Thermal impact: minimal. The built-in recorder uses the Media Engine hardware encoder, barely touching the CPU. You can record for hours without throttling.
- File size on 13" Air: roughly 30-50 MB per minute of full-screen recording at native resolution, depending on screen content complexity. Static slides produce smaller files; fast-moving UI or video playback produces larger ones.
- Battery drain: approximately 10-15% per hour of recording — the lowest of any method.
- No system audio capture. If you're recording a presentation with embedded video, viewers won't hear the video's audio.
Keyboard Shortcuts
- ⌘ + Shift + 5 — open toolbar
- Enter — start recording
- ⌘ + Control + Esc — stop recording
- Esc — cancel without recording
Limitations
- No system audio
- No webcam overlay
- No editing tools
- No auto-zoom — cursor movements stay at native scale, making small clicks invisible in the final video
For a deeper walkthrough, see the full how to screen record on Mac guide.
Method 2: Screenify Studio
Screenify Studio records screen, system audio, and webcam simultaneously, then applies post-processing (auto-zoom, captions, styled backgrounds) in the editor. It encodes using Apple Silicon's hardware Media Engine, which matters on the fanless Air — CPU stays cool while the dedicated encoder handles the video stream.
Steps
- Download Screenify Studio — free plan, no watermark, no time limit
- Open the app. The floating recording bar appears at the top of your screen.
- Choose your capture mode:
- Full Screen — records the entire display
- Window — records a single application window with an optional styled background
- Custom Area — drag a rectangle. Hold Shift to lock 16:9 aspect ratio.
- Configure audio:
- System Audio — toggle on to capture app audio, browser audio, meeting audio
- Microphone — select your input. If you're using the Air's built-in mic, Screenify applies noise reduction to minimize keyboard and fan noise (though the Air has no fans, key clatter is still audible)
- Toggle Webcam if you want a camera overlay. The M2 and M3 Air have a 1080p FaceTime HD camera — sharp enough for a small circular overlay. The M1 Air's 720p camera is softer but still usable at overlay sizes.
- Press the record button or use the keyboard shortcut ⌃ + ⌘ + R
- Stop recording with ⌃ + ⌘ + R again or click the menu bar icon
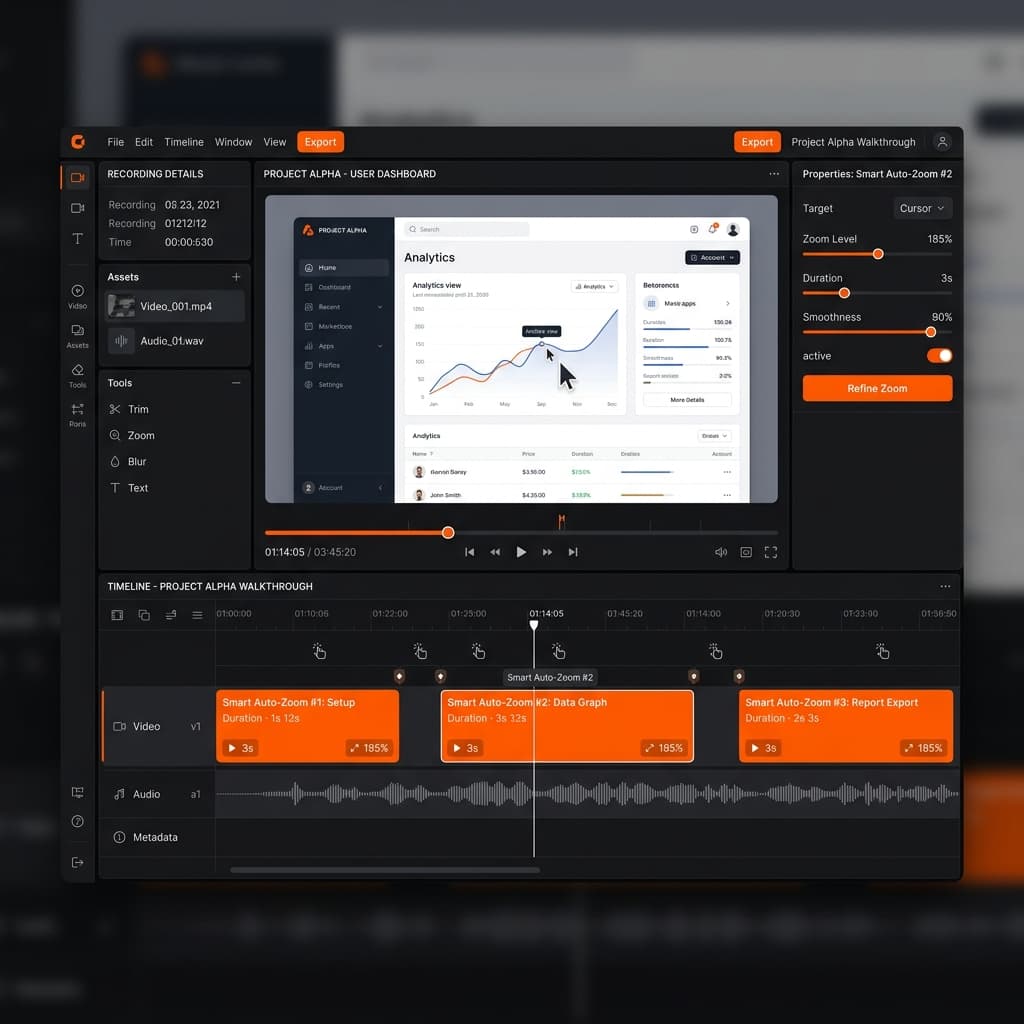
Post-Recording Editor
After recording, Screenify opens the editor where you can:
- Auto-zoom — the AI tracks your cursor and automatically zooms into relevant areas. Critical for tutorials recorded on the Air's high-resolution display, where a button click at native resolution is a 4-pixel target on a 1080p YouTube video.
- Auto-captions — generates subtitles from your narration. Useful if you recorded with the Air's built-in mic in a noisy environment and want to ensure accessibility.
- Background styles — wraps your recording in a gradient, solid color, or image background. Turns a raw screen capture into a polished product demo.
- Cursor effects — highlights and enlarges the cursor, solving the visibility problem inherent in high-DPI recordings.
Why This Matters on MacBook Air
The hardware encoder advantage is real. Screenify offloads encoding to Apple Silicon's Media Engine, the same fixed-function hardware that powers ProRes and HEVC encoding in Final Cut Pro. On the Air specifically:
- CPU stays under 15% during recording — no thermal throttling even on 30+ minute sessions
- Battery drain is comparable to the built-in tool — roughly 12-18% per hour
- 8GB RAM is sufficient — Screenify's recording process uses approximately 200-400 MB of memory. You won't trigger swap unless the app you're recording is the memory hog.
- Export uses Metal — the final processed video renders using GPU acceleration, finishing significantly faster than CPU-based encoding and consuming less battery
If you're recording with a webcam, Screenify handles the 1080p FaceTime camera feed without noticeable performance impact.
Try Screenify Studio — free, unlimited recordings
Auto-zoom, AI captions, dynamic backgrounds, and Metal-accelerated export.
Method 3: OBS Studio (Free, Open-Source)
OBS is the standard for streamers, but it works as a local recorder too. The trade-off on MacBook Air: OBS uses software encoding by default, which means heavy CPU usage and guaranteed thermal throttling on long sessions.
Steps
- Download OBS from obsproject.com — select the macOS (Apple Silicon) build
- On first launch, grant Screen Recording and Microphone permissions in System Settings > Privacy & Security
- Run the Auto-Configuration Wizard — select "Optimize just for recording"
- In the Sources panel, click + and add:
- macOS Screen Capture — select your display
- Audio Output Capture — captures system audio (requires macOS 13+)
- Audio Input Capture — for microphone
- Video Capture Device — for webcam (optional)
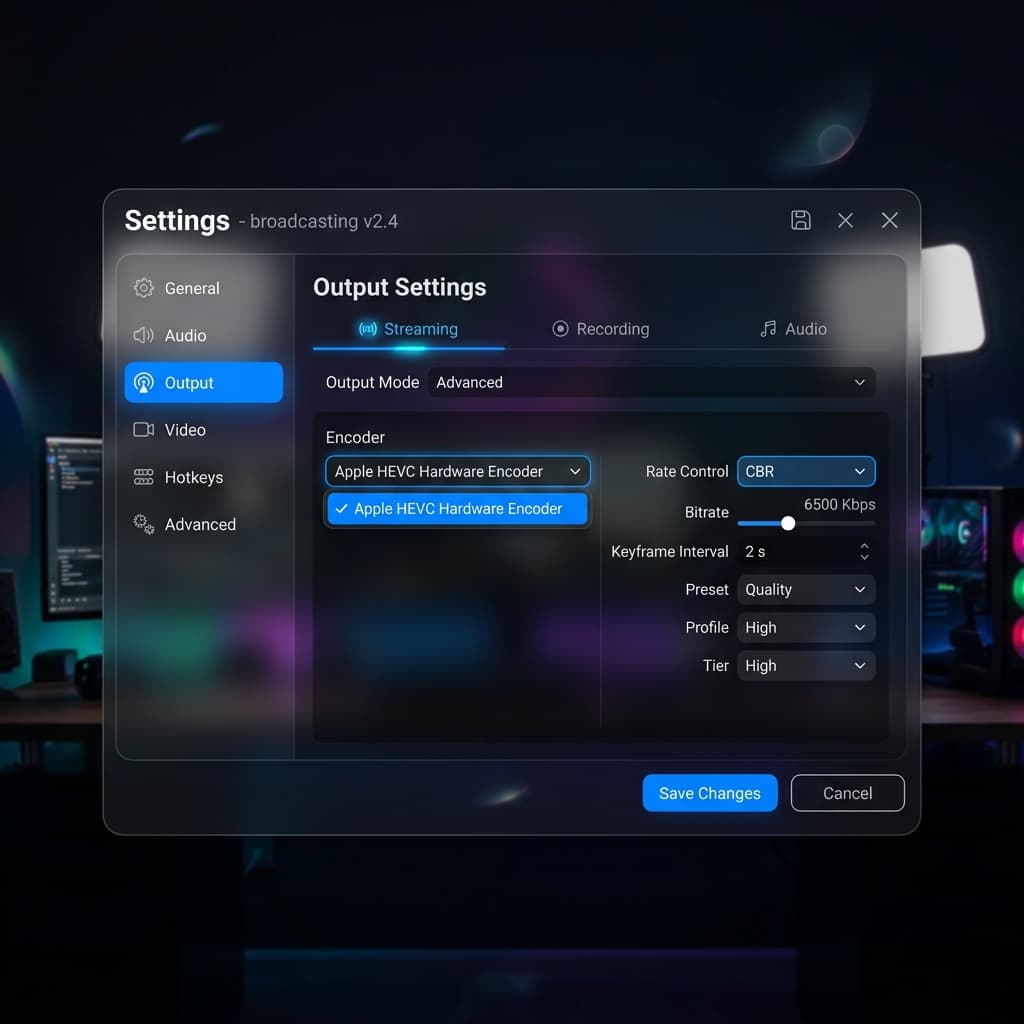
- In Settings > Output > Recording:
- Recording Format: select MKV or MP4 (MKV is safer — recoverable if OBS crashes)
- Encoder: select Apple VT H264 Hardware Encoder — this is critical on the Air. The default x264 software encoder will thermal throttle your machine within minutes.
- Click Start Recording or press the hotkey you've configured
- Click Stop Recording when done
Air-Specific Configuration
Change the encoder immediately. OBS defaults to x264 (software encoding) which pins the CPU at 60-80% utilization. On the fanless Air, this triggers thermal throttling within 5-10 minutes — you'll see frame drops, UI lag, and the chassis gets uncomfortably hot.
Switch to Apple VT H264 Hardware Encoder in Settings > Output > Recording. This offloads encoding to Apple Silicon's dedicated hardware and drops CPU usage to under 20%.
Lower the output resolution. OBS captures at your display's native resolution by default. On the 15" Air, that's 2880x1864 — overkill for most use cases. In Settings > Video, set:
- Base Resolution: your display's native (auto-detected)
- Output Resolution: 1920x1080
- Downscale Filter: Lanczos
This reduces encoding load and file size while delivering standard HD output.
Reduce framerate to 30 fps. Unless you're recording gameplay, 30 fps is sufficient for tutorials, demos, and presentations. It halves the encoding work compared to 60 fps.
Limitations
- No built-in editing — OBS records raw video. You'll need a separate editor for trimming, zoom effects, or captions.
- Complex interface — the scene/source model is designed for live streaming. Recording a single screen is overconfigured.
- System audio requires macOS 13+ — the native Audio Output Capture source works on Ventura and later. On older macOS versions, you need a third-party audio routing tool like BlackHole.
- High baseline resource usage — even with hardware encoding, OBS's process overhead is higher than purpose-built recording apps. Background tasks (chat integration, scene switching, plugin management) consume memory and CPU cycles.
Method 4: Screen Studio
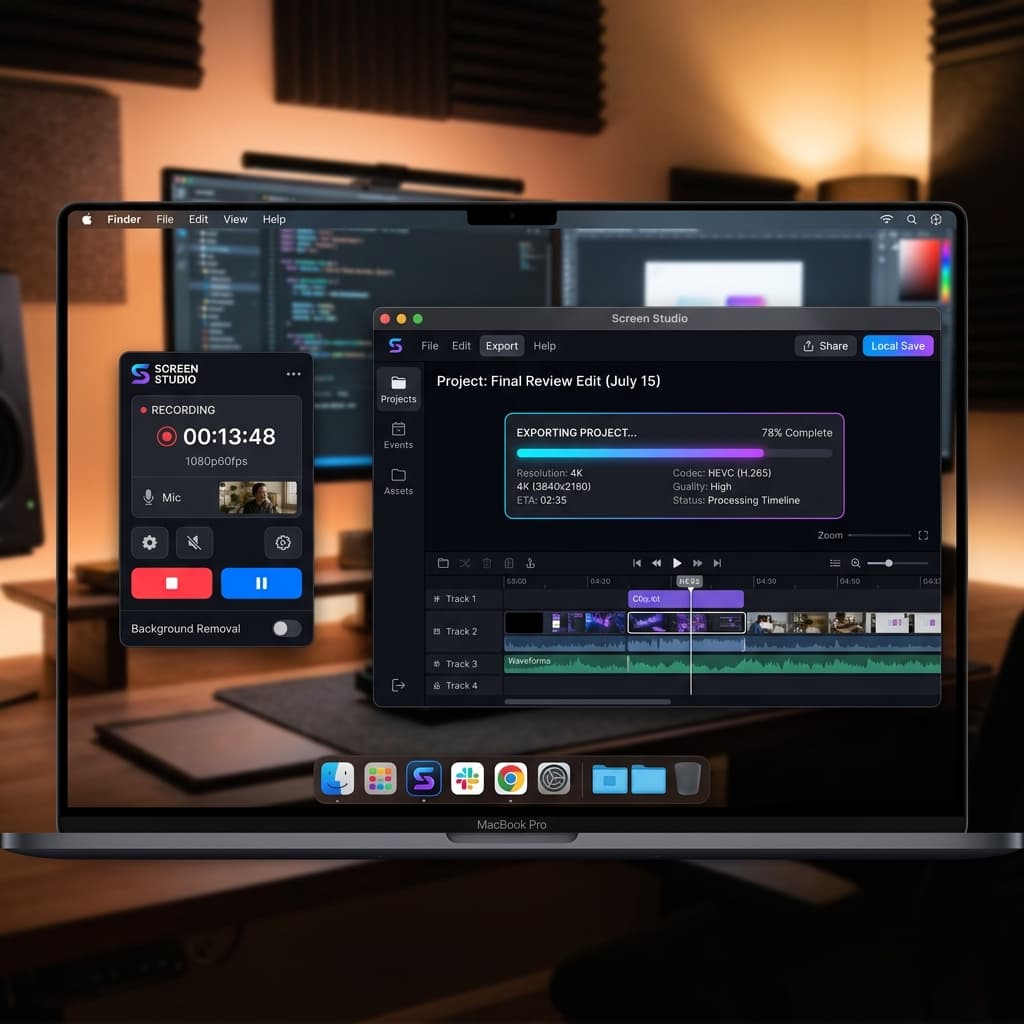
Screen Studio is a Mac-native recording app with automatic zoom and beautiful export styles. It's a one-time purchase rather than a subscription.
Steps
- Download Screen Studio from screen.studio — 14-day free trial, then $89 one-time
- Grant Screen Recording, Microphone, and Camera permissions
- Click the menu bar icon to open the recording panel
- Choose your capture area — full screen, window, or custom region
- Enable system audio, microphone, and webcam as needed
- Click Record
- Stop recording from the menu bar or with the configured hotkey
Air-Specific Notes
- Encoding: Screen Studio uses Apple's hardware encoder, so thermal behavior is similar to Screenify — reasonable for the Air.
- Memory usage: Screen Studio's editor loads the full recording into memory for processing. On 8GB Air models, editing a 20+ minute recording alongside other apps can cause memory pressure. Close other applications before entering the editor.
- Export times: Screen Studio re-encodes the video with zoom animations and effects during export. A 10-minute recording on the M2 Air typically exports in 2-4 minutes. The M3 Air's improved GPU handles this faster.
- File size: exports are heavily compressed by default. A 10-minute recording produces roughly 100-200 MB, which is manageable on the 256GB base model.
Limitations
- $89 upfront cost — no free tier
- macOS only — if you switch platforms, your investment doesn't transfer
- Heavy export processing — the automatic zoom and styling require significant compute during export, though recording itself is lightweight
Troubleshooting: MacBook Air-Specific Issues
1. Recording Stutters or Drops Frames After 10-15 Minutes
Cause: thermal throttling. The MacBook Air's fanless chassis dissipates heat passively. During sustained recording, the SoC temperature rises until it hits the thermal limit and reduces clock speed.
Fixes:
- Place the Air on a hard, flat surface — not a lap, bed, or couch. Soft surfaces block the bottom chassis heat dissipation.
- Use a laptop stand or cooling pad with passive airflow channels. Even a simple aluminum stand improves cooling by exposing the bottom of the machine to air.
- Close unnecessary apps. Every active process adds thermal load. Quit Slack, close extra browser tabs, stop any background syncing (Dropbox, iCloud Drive).
- Switch to hardware encoding if using OBS (see Method 3 above).
- Record at 30 fps instead of 60 fps.
- Record a selected area instead of full screen — fewer pixels means less encoding work.
2. "Not Enough Disk Space" During Recording
Cause: the 256GB base model ships with roughly 230GB usable. macOS itself consumes 25-35GB. Apps, documents, and cached data eat the rest. A full-screen recording at native resolution generates 30-50 MB per minute — a 60-minute recording needs 2-3 GB of free space.
Fixes:
- Check available storage: Apple Menu > About This Mac > Storage (or System Settings > General > Storage on macOS Ventura+)
- Delete old recordings. Screen recordings accumulate on the Desktop or in the configured save folder. A week of recording sessions can easily total 10-20 GB.
- Empty the Trash. macOS doesn't free space when you delete a file — only when you empty the Trash.
- Offload files to an external SSD. A USB-C external drive works as a recording destination. In the built-in recorder, set Save to to the external drive. In Screenify and OBS, change the output path in settings.
- Clear system caches: open Finder > Go > Go to Folder and navigate to
~/Library/Caches. Sort by size and delete cache folders for apps you no longer use.
3. Battery Dies Mid-Recording
Cause: screen recording accelerates battery drain to 15-25% per hour depending on the tool and workload. A fully charged Air lasts roughly 4-6 hours of continuous recording — less if you're also running resource-intensive apps, if display brightness is high, or if you're on a video call simultaneously.
Fixes:
- Plug in. This is the simplest solution. A USB-C charger eliminates the constraint entirely.
- Reduce display brightness. The screen is the single largest power consumer. Drop brightness to the minimum comfortable level. On the Air's Liquid Retina display, even 50% brightness is legible indoors.
- Enable Low Power Mode: System Settings > Battery > Low Power Mode. This reduces background activity and lowers display brightness slightly. It does NOT affect recording quality — the hardware encoder runs at full capability regardless.
- Close background apps. Each active process draws power from CPU and memory.
- Disable Wi-Fi if you don't need it during recording. Constant radio activity for background syncing, notifications, and cloud services adds measurable drain.
- Use the built-in recorder or Screenify for the lowest power draw. OBS with software encoding draws noticeably more power.
4. Built-in Microphone Picks Up Keyboard Noise
Cause: the MacBook Air's microphone array sits in the top lid near the display hinge — close to the keyboard. The Air's keys, while quieter than older butterfly keyboards, still produce audible clicks that the mic captures clearly during narration.
Fixes:
- Use an external microphone. Even a $30 USB condenser mic placed on a desk stand, away from the keyboard, dramatically improves audio. Wireless options like AirPods Pro work too — the microphone quality is acceptable for screen recordings and eliminates keyboard proximity entirely.
- In Screenify Studio, enable microphone noise reduction in the audio settings. The AI-based filter suppresses transient sounds like key clicks while preserving voice.
- Reduce keyboard input during narration. Narrate your actions, pause, then type. This produces cleaner audio with less post-processing needed.
- Avoid recording in a room with hard walls and no soft furnishings — the Air's mic picks up echo and reverb easily.
5. Webcam Feed Looks Grainy or Dark
Cause: the M1 MacBook Air has a 720p FaceTime HD camera — noticeably softer than the 1080p cameras on M2 and M3 models. Both generations struggle in low light because the sensor is tiny.
Fixes:
- Improve lighting. Face a window for natural light, or use a desk lamp positioned behind your monitor pointing toward your face. The single biggest improvement for webcam quality on any laptop is better lighting — the camera sensor is the bottleneck, not the resolution.
- On M1 Air, keep the webcam overlay small. A circular overlay in the corner of the recording still looks clean at 720p because it occupies a small portion of the frame.
- On M2/M3 Air, the 1080p camera is sharp enough for medium-sized overlays. You can use a larger rectangular webcam panel for talking-head segments.
- In System Settings > Camera (macOS Sonoma+), check if Center Stage is enabled. Center Stage crops and pans the frame digitally, which reduces effective resolution. Disable it if you're sitting still at your desk.
Try Screenify Studio — free, unlimited recordings
Auto-zoom, AI captions, dynamic backgrounds, and Metal-accelerated export.
FAQ
How long can I record on a MacBook Air before it thermal throttles?
With the built-in recorder or hardware-accelerated apps like Screenify Studio, the Air handles recordings well beyond an hour without noticeable throttling. The hardware Media Engine generates minimal heat. With OBS using software encoding, expect throttling to begin within 10-15 minutes, especially in warm environments or on soft surfaces.
Does screen recording damage the MacBook Air battery long-term?
No. Apple Silicon Macs manage battery health automatically, including optimized charging that stops at 80% when plugged in for extended periods. Screen recording does draw more power than idle use, but the thermal and power management systems protect the battery. You'd need to record many hours daily for years to notice measurable battery degradation beyond normal aging.
Should I record at the Air's native resolution or downscale?
For YouTube, social media, or sharing links — record at native and let the export handle downscaling to 1080p or 4K. The native resolution gives you headroom for auto-zoom and cropping in post. For quick internal recordings or bug reports where file size matters, recording a selected area at 1920x1080 reduces file size and encoding load without visible quality loss.
Is 8GB RAM enough for screen recording on MacBook Air?
Yes, for recording alone. The recording process itself uses 200-400 MB across most tools. The constraint appears when you're recording while running memory-heavy apps. If your typical workflow involves a browser with many tabs, a design tool, and a communication app all running simultaneously, 8GB requires macOS to swap to disk. The recording itself won't drop frames, but your entire system may feel slower. 16GB eliminates this concern.
Can I record the MacBook Air screen with an external monitor connected?
Yes. When an external display is connected via USB-C or Thunderbolt, all four recording methods can capture either screen independently. The built-in Screenshot toolbar shows a display selector when you have multiple monitors. Screenify Studio lets you choose the target display in the capture mode selector. OBS requires adding a separate macOS Screen Capture source for each display. Note: driving an external display increases thermal load, so expect slightly earlier throttling on extended recordings.
Does Low Power Mode affect recording quality?
No. Low Power Mode reduces background activity and may slightly dim the display, but it does not throttle the hardware Media Engine or reduce recording framerate. Your recordings will be identical in quality whether Low Power Mode is on or off. Enabling it during recording sessions is a free way to extend battery life without any quality trade-off.
What file format should I use to save space on the 256GB model?
HEVC (H.265) produces the smallest files for a given quality level. The built-in recorder and Screenify Studio use HEVC by default on Apple Silicon Macs. In OBS, select the Apple VT H265 Hardware Encoder. Avoid ProRes or uncompressed formats on the 256GB Air — a 10-minute ProRes recording at native resolution can exceed 5 GB, while the same recording in HEVC is typically under 500 MB.
Is the MacBook Air's built-in microphone good enough for recording tutorials?
It's adequate for informal recordings — internal demos, bug reports, quick walkthroughs. The three-microphone array on M2 and M3 models with directional beamforming is noticeably better than the M1 Air's dual-microphone setup. For published content — YouTube tutorials, course material, client demos — an external microphone is worth the investment. A USB condenser mic ($30-50) or AirPods Pro provides cleaner audio with less background noise and no keyboard clatter.
Which Method to Choose on MacBook Air
For quick captures with minimal battery drain: use the built-in Screenshot toolbar. Zero overhead, hardware-encoded, no installation needed.
For polished tutorials and product demos: download Screenify Studio. Hardware-accelerated recording keeps the Air cool, and the auto-zoom, captions, and background features eliminate the need for a separate editor — important when you're working with limited storage and don't want to install additional editing software.
For streaming or advanced multi-source setups: use OBS, but switch to the hardware encoder immediately and record at 1080p output. Accept that OBS will use more resources than purpose-built recording apps.
For one-time purchase with automatic styling: Screen Studio works well on the Air for recordings under 20 minutes. Budget for the 8GB memory constraint during editing if you're on the base model.
The MacBook Air handles screen recording better than its fanless, ultralight design might suggest — Apple Silicon's dedicated Media Engine does the heavy lifting. The key is choosing tools that actually use it.
Try Screenify Studio
Record your screen with auto-zoom, AI captions, dynamic backgrounds, and Metal-accelerated export. Free plan, unlimited recordings.
Download Free


