How to Screen Record for YouTube on Mac
Record YouTube-ready screen videos on Mac — resolution, framerate, audio, and post-production for tutorial channels.
Recording for YouTube is not the same as recording a quick clip for Slack. Your file has to survive YouTube's re-encode, look sharp at 1080p on a phone, read clearly on a 4K TV, sound balanced against every other creator's video, and hold attention for 8+ minutes. The settings you pick before you hit record decide most of that outcome — no amount of editing can rescue a blurry 30fps capture of a tutorial full of fast cursor moves.
This guide covers the four realistic ways Mac creators record YouTube content today, the exact specs YouTube wants, and the small decisions that separate a tutorial channel that grows from one that doesn't.
Quick comparison
| Tool | Price | Best for | Max specs | Difficulty |
|---|---|---|---|---|
| Screenify Studio | Free plan, Pro $12/mo | Tutorial channels, software demos, fast turnaround | 4K60, AAC 384k, YouTube preset | Easy |
| OBS Studio | Free | Live streamers, multi-scene setups, advanced audio routing | 4K60, custom encoder | Hard |
| Screenshot Toolbar + iMovie | Free (built-in) | Simple talking-head tutorials, no budget | 1080p/native, 60fps on M-series | Easy |
| Screen Studio | $89 one-time | Polished marketing clips, one-click YouTube export | 4K60, auto-zoom | Easy |
Screenify and Screen Studio both target creators who want a finished video without spending an hour in a separate editor. OBS wins if you need multi-camera scenes or live streaming. The built-in route is fine if your tutorial doesn't need zooms or cursor effects.
What YouTube actually wants
Before picking a tool, lock these specs in your head. YouTube's upload encoder is lossy and aggressive — giving it clean input is half the battle.
Resolution: 1920×1080 (1080p) is the floor for a tutorial channel in 2026. 3840×2160 (2160p / 4K) is the smart choice even if your viewers mostly watch at 1080p, and here's why: YouTube applies the VP9 codec to 1440p+ uploads, and the much higher bitrate budget for 4K means the 1080p version transcoded from it looks noticeably cleaner than a native 1080p upload that only gets H.264 at a lower bitrate. Uploading 4K is the single cheapest quality upgrade you can make.
Framerate: 60fps for software tutorials. 30fps is acceptable for talking-head overlays or slow walkthroughs, but cursor motion and UI animations look choppy at 30. YouTube serves 60fps to modern browsers without issue. Do not mix framerates in a timeline — pick one and commit.
Codec and bitrate for upload: H.264 High Profile, AAC-LC stereo. YouTube's recommended bitrates:
- 1080p30: 8 Mbps
- 1080p60: 12 Mbps
- 2160p30: 35–45 Mbps
- 2160p60: 53–68 Mbps
Going above these is fine — YouTube will re-encode anyway, and extra headroom means less quality lost in your encoder before upload.
Audio: 48 kHz, stereo, AAC at 384 kbps for the upload. Target loudness: -14 LUFS integrated with true peak at -1 dBTP. YouTube normalizes anything louder than -14 LUFS down, so mastering hotter than that just loses you dynamic range.
Aspect ratio: 16:9 for regular videos (1920×1080 or 3840×2160). 9:16 (1080×1920) for Shorts. If you plan to repurpose a tutorial into Shorts, record the key demo area with Shorts crop in mind — leave the center column usable in portrait.
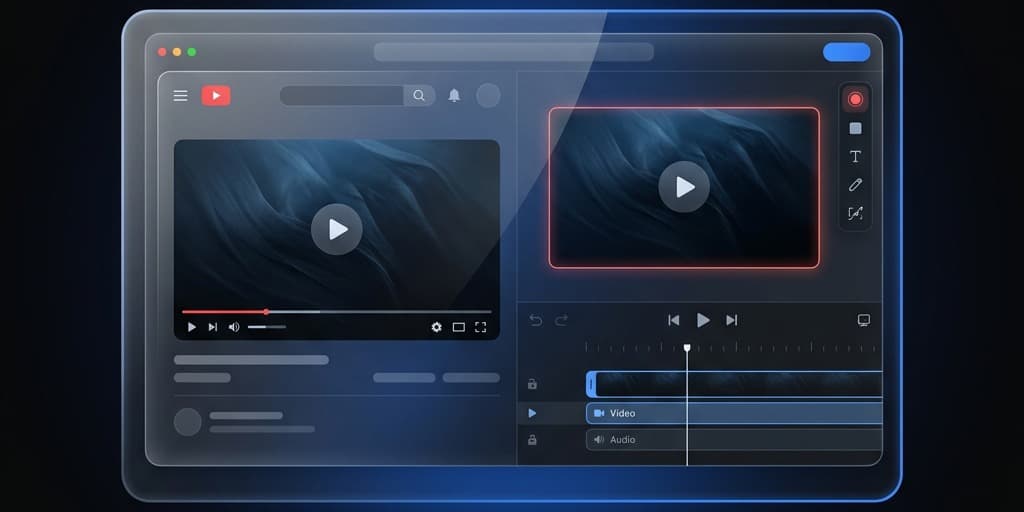
Method 1: Screenify Studio (YouTube preset)

Screenify is built around the assumption that you're going to post what you record, so the capture and export presets map directly to destinations like YouTube.
Setup
- Download Screenify Studio and grant Screen Recording + Microphone permissions in System Settings.
- Open preferences and set capture to 2160p60 if your Mac is M-series (M1/M2/M3/M4). If you're on Intel, stick with 1080p60 to avoid dropped frames.
- Under Audio, pick your microphone (external USB or XLR via interface is strongly preferred over the built-in array) and enable System Audio if your tutorial needs app sounds.
- Turn on AI Captions in Post-production. YouTube's auto-captions are decent but punctuate oddly; Screenify generates an SRT you can upload for cleaner accessibility.
Recording
Launch the capture picker and choose Window if you're demoing a single app, or Area if you need a fixed 16:9 crop. Area capture is the right choice when you plan to also cut Shorts from the same recording — set an area that keeps the important UI near the vertical center.
Screenify's auto-zoom follows your cursor and snaps gentle zooms on clicks. For YouTube tutorials this is the single biggest reason to use it over OBS or the Screenshot toolbar — viewers on phones cannot read menu items at 1080p without a zoom, and manually cutting zooms in Final Cut is slow.
Export for YouTube
Screenify ships a YouTube 1080p and YouTube 4K export preset. Both use:
- H.264 High Profile, two-pass
- 12 Mbps (1080p60) or 60 Mbps (2160p60)
- AAC 384 kbps stereo at 48 kHz
- Loudness normalized to -14 LUFS
- MP4 container with
+faststartso YouTube's ingester parses metadata immediately
Export on Apple Silicon uses VideoToolbox hardware encoding — a 10-minute 4K60 tutorial finishes in under 90 seconds on an M2 Pro. Compare that to software x264 in OBS, which can take longer than the video itself.
Captions: Screenify also exports an .srt next to the .mp4. Upload both to YouTube Studio and disable auto-captions so your version wins.
Try Screenify Studio free — the free plan covers single-camera captures up to 1080p60, which is enough to publish a full tutorial.
Try Screenify Studio — free, unlimited recordings
Auto-zoom, AI captions, dynamic backgrounds, and Metal-accelerated export.
Method 2: OBS Studio (for the advanced setup)
OBS is free, open-source, and the default for anyone who already streams. It is also the most work to configure correctly for YouTube recording, because the defaults are tuned for live streaming at lower bitrates.
Settings for YouTube tutorials
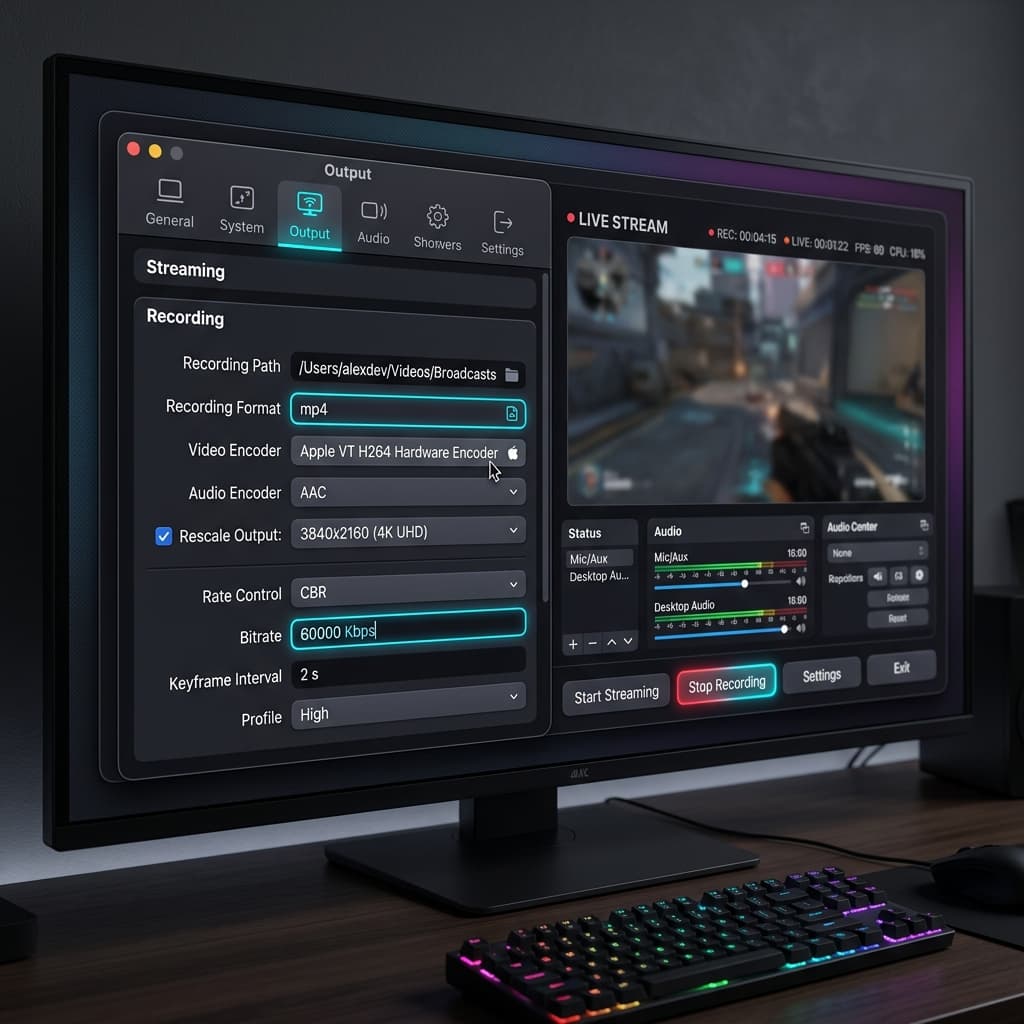
Open Settings → Output and switch to Advanced mode.
Recording tab:
- Type: Standard
- Format:
mp4(ormkvif you're worried about crashes, then remux withffmpeg -c copyafter) - Encoder: Apple VT H264 Hardware Encoder on Apple Silicon. Software x264 gives slightly better quality but burns your CPU.
- Rate Control: CBR
- Bitrate: 60000 Kbps for 4K60, 20000 Kbps for 1080p60 (give yourself headroom above YouTube's recommendations)
- Profile: high
- Keyframe interval: 2
Video tab:
- Base (Canvas) Resolution: 3840×2160 or 1920×1080
- Output (Scaled) Resolution: same as base — never downscale in OBS for YouTube
- Downscale Filter: Lanczos (only matters if base ≠ output)
- Common FPS: 60
Audio tab:
- Sample Rate: 48 kHz
- Channels: Stereo
- Separate tracks for mic and desktop audio if you want to mix later in your editor
Add a Display Capture or Window Capture source. Window Capture is safer on macOS Sonoma and later because Display Capture sometimes triggers the orange privacy border in recordings.
Why OBS is hard to love for tutorials
OBS records what you see, with no automatic zooms, no cursor effects, no captions. You'll be doing all of that in Final Cut, Premiere, or DaVinci afterwards. If that's your existing workflow, great — OBS is the most flexible capture source you can get. If it's not, you'll spend more time in post than recording.
Method 3: macOS Screenshot Toolbar + iMovie
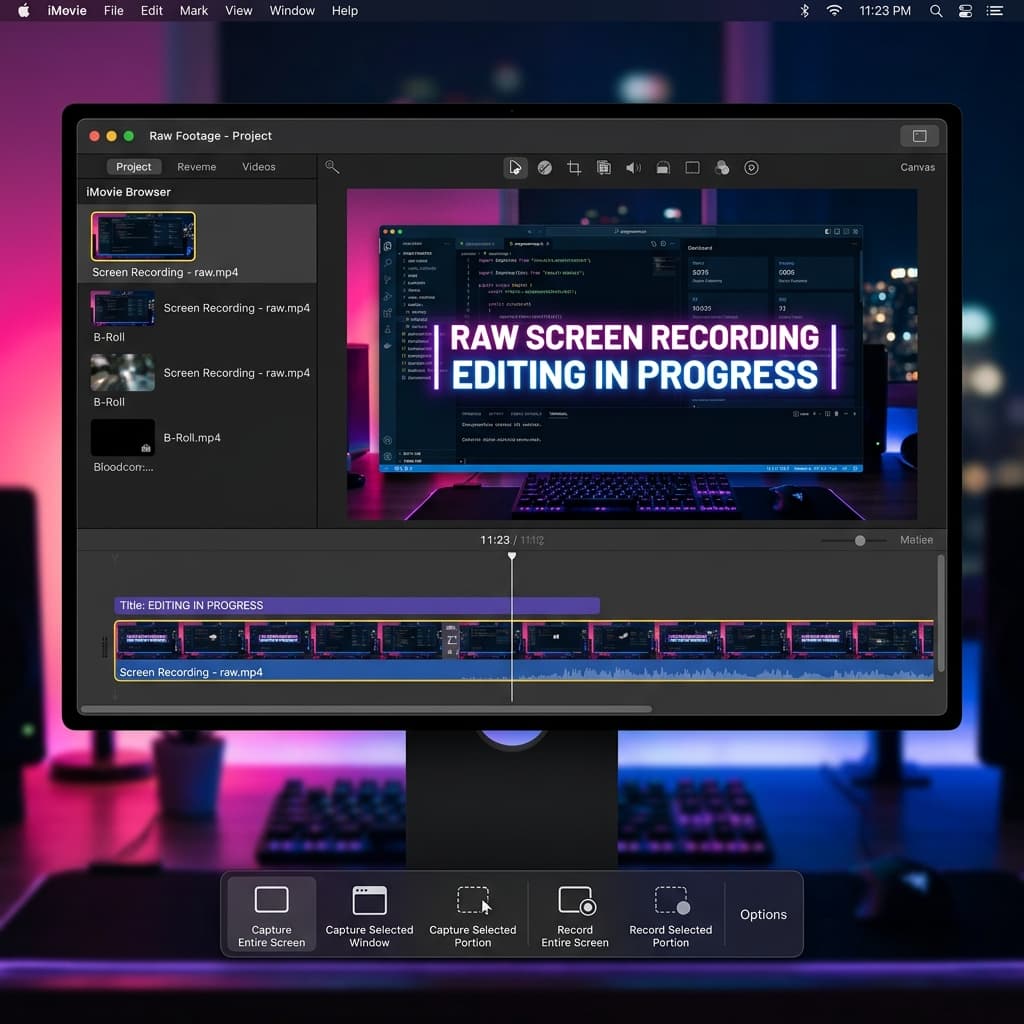
Every Mac ships with a built-in screen recorder. It's not obvious from the menus, but it's reachable via the system Screenshot shortcut — hold Command-Shift-5 and the floating toolbar appears at the bottom of the screen.
Recording
From the toolbar, pick Record Entire Screen or Record Selected Portion. Before you click Record, open Options and:
- Set Microphone to your USB mic (not "None" and not "Internal Microphone" unless you have no choice)
- Set Save to to a project folder, not Desktop
- Turn on Show Mouse Clicks so viewers can see when you click
- Turn off Show Floating Thumbnail so it doesn't appear in your next clip
Click Record. To stop, click the stop icon in the menu bar or press Command-Control-Escape.
Framerate caveat: The Screenshot toolbar records at your display's refresh rate. On a standard 60Hz MacBook this gives you 60fps. On a 120Hz ProMotion MacBook Pro display, it can record at 120fps — which is too much for YouTube and wastes file size. Work around this by setting your display to 60Hz in System Settings → Displays before recording, or by conforming to 60fps in iMovie.
Editing in iMovie
Import the .mov into iMovie, cut your mistakes, add titles, and export via File → Share → File.
- Resolution: 1080p (iMovie cannot export 4K from a 4K source unless you started from an iPhone clip — this is a real limitation if you want to upload 4K)
- Quality: High
- Compress: Faster
iMovie's exports are H.264 and YouTube-compatible, but the audio master is weak — no loudness normalization, so you'll upload hot and get turned down. If you care about audio, bring your recording into GarageBand for a -14 LUFS pass before uploading.
The built-in route works, but the lack of 4K export and the manual loudness work are why most tutorial channels outgrow it within a month.
Method 4: Screen Studio (one-click export)
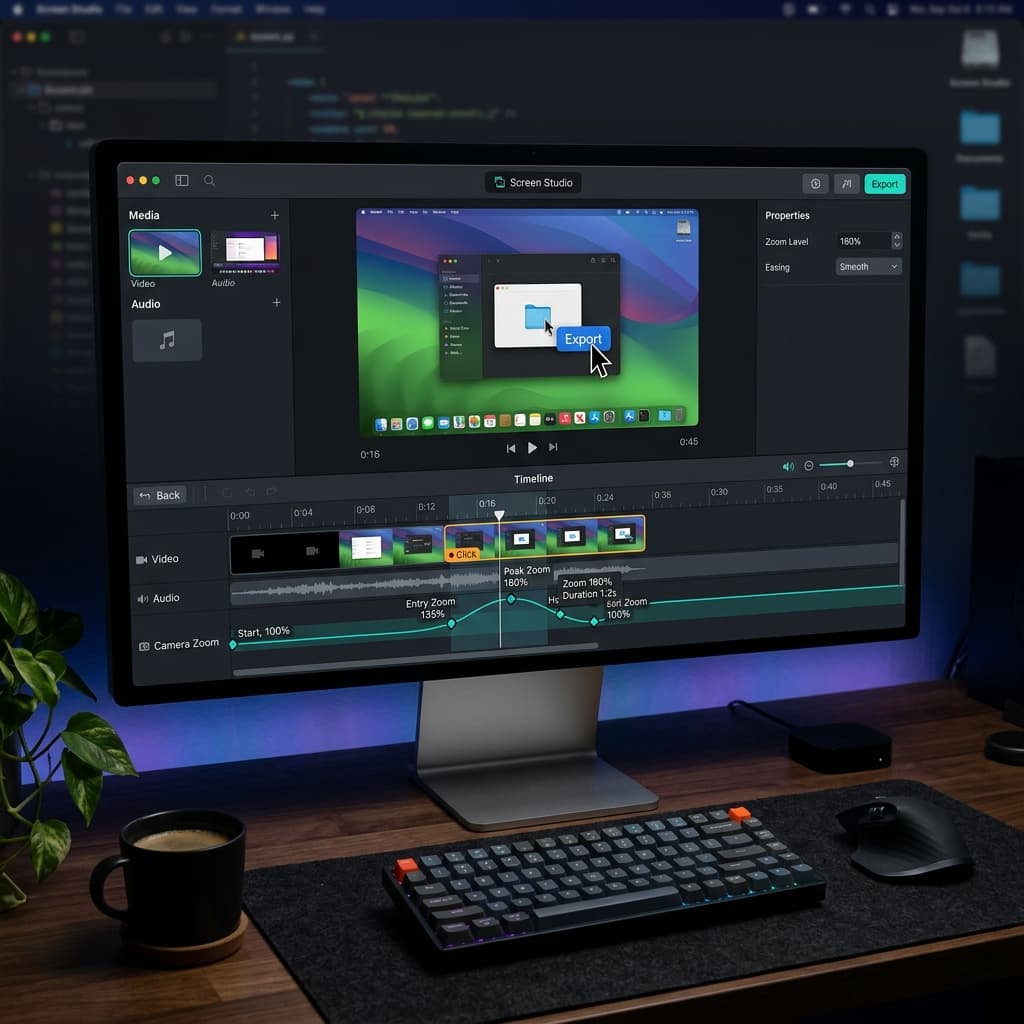
Screen Studio is the most polished commercial option for creators who want a cinematic look with zero effort. It costs $89 once.
Recording and export
Launch Screen Studio, pick your capture region, record. When you stop, it drops you into a timeline with auto-generated zooms already applied to every click.
The Export dialog has a YouTube preset that produces H.264 MP4 at 1080p60 or 4K60 with sensible bitrates (around 12 Mbps and 40 Mbps respectively). Audio is -14 LUFS by default. There is no separate captions export — you'll rely on YouTube's auto-captions or generate an SRT elsewhere.
Screen Studio's strength is the visual polish: the click-zoom animations look expensive, the cursor is redrawn as a smooth vector, and backgrounds get a subtle gradient. Its weakness for tutorial channels is the lack of true multi-take editing — if you stumble mid-sentence, trimming is fine, but complex rearrangements are easier in Final Cut. No captions export is also a genuine drawback if accessibility matters to you.
If your channel is short product demos and marketing clips, Screen Studio is excellent. For long-form tutorials with lots of cuts, you'll end up in a real NLE anyway.
Troubleshooting YouTube-specific issues
1. Banding and posterization in dark scenes
YouTube's H.264 re-encode aggressively crushes low bitrate gradients, and if your source already has 8-bit banding in dark areas, the upload will look like topographic contour lines. Fixes:
- Upload 4K even if you recorded 1080p — the higher bitrate budget preserves gradients better
- Add very subtle grain (1–2%) in post. Grain gives the encoder something to hold onto and kills banding
- Avoid pure-black backgrounds in screen recordings;
#0a0a0ainstead of#000000is enough to give the encoder room
2. Cursor looks choppy even though you recorded 60fps
This usually means you recorded 60fps but your project timeline is 30fps and your editor is dropping every other frame. Check the sequence/project framerate in Final Cut, Premiere, or DaVinci and match it to 60fps before importing clips.
Also check that you didn't apply a "smart render" or "optimize media" pass that transcoded to 30fps ProRes proxies.
3. Audio gets quieter after YouTube processes the upload
You uploaded louder than -14 LUFS. YouTube turned it down. Master your audio to -14 LUFS integrated, -1 dBTP true peak before export. Screenify does this automatically; in iMovie you'll need a GarageBand pass; in Final Cut the Loudness meter in the audio inspector tells you where you are.
4. "Processing 4K will take a while" stays forever
YouTube processes 4K and HD separately. The SD and 720p versions go live in a few minutes; 1080p typically within 30 minutes; 4K can take several hours on a long video. This is normal. Publish with HD available and let 4K catch up in the background — do not delete and re-upload.
5. The orange privacy indicator appears in your recording
macOS Sonoma+ shows an orange screen recording indicator in the top-right corner. Older versions of some capture tools render it into the video because they capture the whole framebuffer. Fixes:
- Use a Window capture instead of a Display capture when possible
- In Screenify, Window and Area capture both exclude the indicator automatically
- In OBS, prefer the macOS Screen Capture source over Display Capture (legacy)
YouTube-specific things to plan before you hit record
Title-safe area. YouTube overlays the title in the top-left when a video is embedded or previewed. Keep important UI out of that zone for the first 5 seconds. More critically, the last 20 seconds are where end screens appear — the top-right and bottom-right corners get cards and subscribe prompts. Don't show critical demo steps in the last 20 seconds, and don't put your final "thanks for watching" text in the top-right.
Chapters from your script. YouTube auto-generates chapters if your description contains timestamps in the format 0:00 Intro, 1:23 Setting up, 3:45 First demo. Write your script with section breaks, note the timestamps as you edit, and paste them into the description. Chapters dramatically improve retention and search discoverability for tutorials.
Thumbnail capture. Before you stop recording, hit a clean frame that would make a good thumbnail — a menu open, a result visible, your face if you're on camera. It's much easier to screengrab from your own recording than to stage a thumbnail shoot later.
Pacing for tutorial channels. YouTube's data is clear: the first 15 seconds decide retention. Don't open with a logo sting. Show the end result in the first three seconds, then say what you're going to teach, then do it. Cut dead air ruthlessly — viewers can rewind, they cannot un-click.
Get Screenify Studio if you want a capture tool that already bakes in YouTube presets and caption export so you can focus on the script instead of encoder settings.
Related reading
- Recording at native 4K on Mac — the full rundown on hitting real 2160p without dropped frames.
- Screen recording with narration — getting microphone levels right the first time.
- How to screen record on Mac — the broader overview of every method, not just for YouTube.
Try Screenify Studio — free, unlimited recordings
Auto-zoom, AI captions, dynamic backgrounds, and Metal-accelerated export.
FAQ
Should I record at 1080p or 4K if my audience watches at 1080p?
Record and upload 4K. YouTube uses a better codec (VP9) and higher bitrate budget for 4K uploads, which means the 1080p version served to your viewers looks cleaner than if you'd uploaded native 1080p. The only reason to stay at 1080p is if your Mac drops frames at 4K60 — then 1080p60 beats a stuttering 4K.
Is 30fps enough for a tutorial?
For talking-head content, yes. For anything showing UI animations, scrolling, or cursor movement, no — 60fps makes cursor motion readable and software feel responsive. Software tutorials especially benefit, because viewers need to track where your cursor goes.
What bitrate should I export at?
Follow YouTube's recommendations as a floor and go higher if your tool allows: 12+ Mbps for 1080p60, 60+ Mbps for 2160p60. YouTube re-encodes everything, so you're protecting quality during their encode, not trying to match their final output.
How do I get -14 LUFS audio without buying plugins?
Screenify exports at -14 LUFS by default. In GarageBand, add a Compressor and Limiter on your master bus, then watch the Loudness meter as you play through the loudest section — trim the output fader until the integrated value lands near -14. Free plugins like Youlean Loudness Meter help you measure for free in any DAW.
Can I record 16:9 and 9:16 Shorts from the same file?
Yes, if you plan for it. Record in 16:9 at 4K, and when you compose, keep the critical UI and your face in the center third of the frame. In post, duplicate the timeline, crop to 9:16 (1080×1920), and re-export a Short. Screenify and most NLEs make this a two-minute operation.
Should I use YouTube's auto-captions or upload my own SRT?
Upload your own whenever possible. Auto-captions miss punctuation, mis-hear technical terms, and lag behind speech by about a second. Screenify generates an SRT from your narration on export; upload it in YouTube Studio and disable auto-captions for that video. Creators who upload captions see measurable watch-time lifts, especially on mobile where captions are often on by default.
My tutorial is 15 minutes. How big will the file be?
At 1080p60 / 12 Mbps + 384 kbps audio, roughly 1.35 GB. At 2160p60 / 60 Mbps, roughly 6.7 GB. Both are well within YouTube's 256 GB / 12-hour upload cap.
Do I need a separate thumbnail tool?
Not strictly — you can screengrab from your own recording and overlay text in Preview or Keynote. But a thumbnail is the highest-ROI thing you make for a video (it decides whether anyone clicks), so most growing channels eventually move to Figma or Photoshop for thumbnails. Start with screengrabs from your recording, iterate once your channel has traction.
Try Screenify Studio
Record your screen with auto-zoom, AI captions, dynamic backgrounds, and Metal-accelerated export. Free plan, unlimited recordings.
Download Free


