How to Record Full Screen on Mac
Record your entire Mac display — single screen, multi-monitor setups, and what to do when full-screen recording misbehaves.

"Record the full screen" sounds like the simplest thing you could ask a Mac to do. In practice, it's the most ambiguous phrase in screen recording. Do you mean the whole display from menu bar to Dock? A specific monitor in a three-display setup? A Safari window that's been toggled into full-screen mode with the green button? An app that takes over a Mission Control space? The answer changes which tool you should reach for and which settings matter.
This guide walks through four ways to record a full Mac display, then goes deeper into the parts that actually trip people up — multi-monitor setups, the MacBook Pro notch, Mission Control spaces, Sidecar, DisplayLink drivers, and the privacy landmines hiding in plain sight.
Quick Comparison
| Tool | Price | Multi-monitor | Notch handling | Best for |
|---|---|---|---|---|
| Screenshot Toolbar | Free (built-in) | One display at a time | Crops around it | Fast captures, no editing |
| Screenify Studio | Free plan + Pro | Pick any display, or all | Clean crop below notch | Polished recordings, sharing |
| OBS Studio | Free | Multi-display as scenes | Shows black area | Streaming, advanced users |
| QuickTime Player | Free (built-in) | One display per recording | Crops around it | Quick local files |
None of these is the single right answer. Pick by what you're doing after you stop recording: drop it in a Slack DM, upload to a course platform, stream live, or hand it to a client.
What "Full Screen" Actually Means on macOS
Before picking a tool, get clear on which of these you want to capture:
The entire display. Menu bar, wallpaper, Dock, whatever app is focused — all of it, edge to edge. This is what most people mean when they say "record my screen."
A full-screen app. When you click the green traffic-light button, an app moves into its own Mission Control space and hides the menu bar and Dock. Recording this is technically still "recording a display," but the visual result is very different — no menu bar, no other windows, just the app.
One display in a multi-display setup. If you have a laptop plus an external monitor, "full screen" probably means one of them — but which one?
All displays at once. Occasionally you want both monitors in a single video, side by side. Not every tool supports this cleanly.
Keep this distinction in mind for the rest of the guide. Every tool below handles these cases slightly differently.
Method 1: Screenshot Toolbar — Record Entire Screen
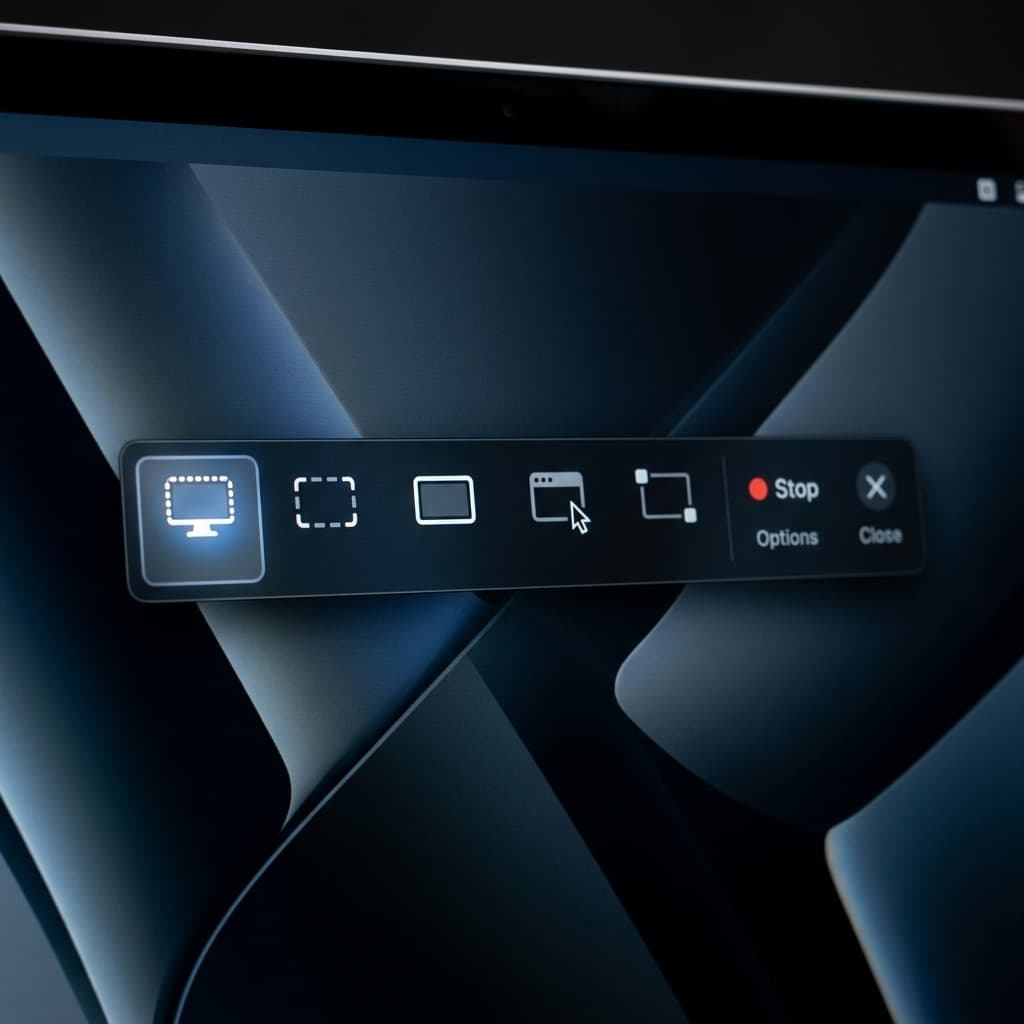
The Screenshot toolbar is macOS's built-in capture UI, and it's the fastest way to get a full-display recording with zero setup.
Steps:
- Open the Screenshot toolbar with the Shift-Command-5 shortcut (or from Launchpad → Other → Screenshot).
- In the floating control strip, pick the leftmost recording icon — it shows a dashed rectangle covering an entire display.
- Click Options to set the save destination, a countdown timer, whether mouse clicks are highlighted, and the built-in microphone as audio input.
- If you have more than one display, hover over the one you want to capture and click anywhere on it.
- Click Record in the floating strip, or just click on the target display directly.
- To stop, click the stop icon in the menu bar or use Command-Control-Escape.
What you get: an H.264 .mov at your display's native resolution, saved wherever you chose. The cursor is included by default. Clicks are optional.
Multi-monitor behavior: when you choose "record entire screen," the toolbar dims every display and asks you to click the one you want. Only one display is captured per recording. If you need both, you'd have to run two sessions — which won't be perfectly synced.
Notch behavior: on 14" and 16" MacBook Pros, the toolbar records the full logical display, which means the menu bar area around the notch is captured. The notch itself becomes a rectangular crop in the video — everything to the left and right of the notch is there, but pixels "behind" the notch simply don't exist in the source, so they appear as black in the final file. More on this below.
Limitations:
- No webcam overlay.
- No window or region bookmarks — you record the whole display or nothing.
- No auto-zoom, highlights, or cursor smoothing.
- Editing means opening the file in iMovie or QuickTime afterward.
It's the right tool when you need a file in under ten seconds and don't care what it looks like. It's the wrong tool when someone is going to watch the recording more than once.
Method 2: Screenify Studio — Full Screen Mode
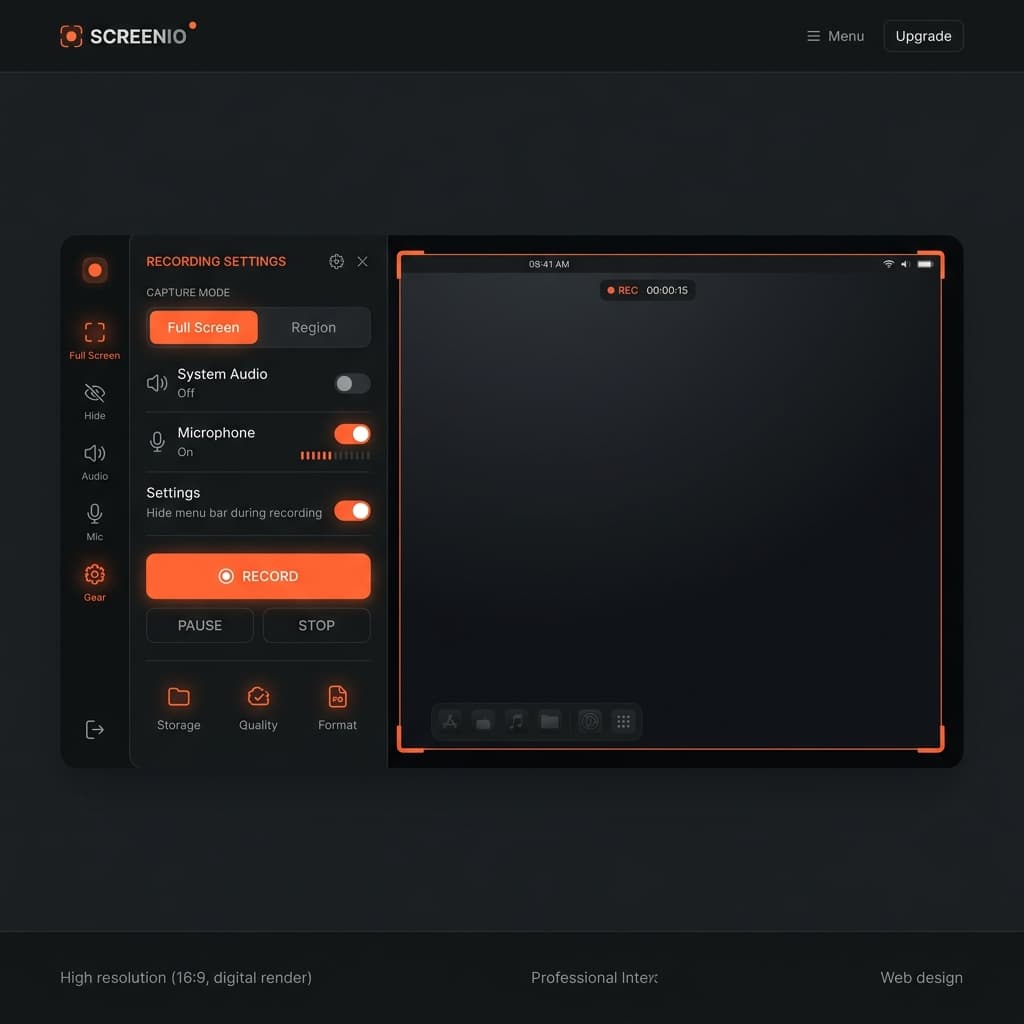
Screenify Studio treats "full screen" as a first-class capture mode, not a fallback. When you open the app and pick Full Screen, it lists every connected display with a thumbnail, resolution, and scaling factor, so you can see exactly what will be recorded before you click record.
Steps:
- Launch Screenify Studio. The capture picker opens by default.
- Select Full Screen from the capture modes.
- If you have multiple displays, pick the one you want from the thumbnail grid. A live preview shows what the recording will include.
- Toggle webcam, microphone, and system audio from the same panel. Pick a resolution cap if you don't want native (useful for large 5K displays).
- Decide whether the menu bar should be included. Screenify offers a "hide menu bar during recording" option that auto-hides it before the clip starts.
- Hit record. A three-second countdown runs, then the capture starts.
- Stop from the menu bar icon or with your assigned global shortcut.
What makes full-screen mode different here:
- Notch-aware framing. On notched MacBook Pros, Screenify detects the notch and offers two modes: "native" (includes the menu bar area with the notch as a black gap) or "clean crop" (trims the output to start below the menu bar, giving you a flat rectangle with no notch artifact). Most people want the second option and don't know it exists until they record their first clip with the notch baked in.
- Multi-display picker. Each connected display is listed by name (e.g. "LG UltraFine" and "Built-in Retina Display"), not just "Display 1" and "Display 2," so you don't accidentally record the wrong one.
- Auto-zoom during full-screen capture. Full-display recordings are hard to watch because everything is small. Screenify's auto-zoom tracks cursor activity and gently pushes in when you interact with a specific area, then pulls back when you move on. You don't have to edit zooms manually.
- Smart cursor and click highlights. The cursor gets a subtle thickening and click ripples, which matter more on a full display than a windowed one because the viewer has a lot of pixels to scan.
- Direct sharing. When you stop, you get a link you can paste into Slack or Notion immediately. No render-and-upload loop.
Full-screen recordings in Screenify also get the rest of the toolkit — background replacement, aspect ratio reframing (export a 16:9 display as a 9:16 vertical if you need it for social), and captions generated from the audio track.
Download Screenify Studio if you want to try the full-screen mode without fighting QuickTime first.
Want the broader overview of Mac screen recording options? The complete guide to screen recording on Mac covers every capture mode side by side.
Try Screenify Studio — free, unlimited recordings
Auto-zoom, AI captions, dynamic backgrounds, and Metal-accelerated export.
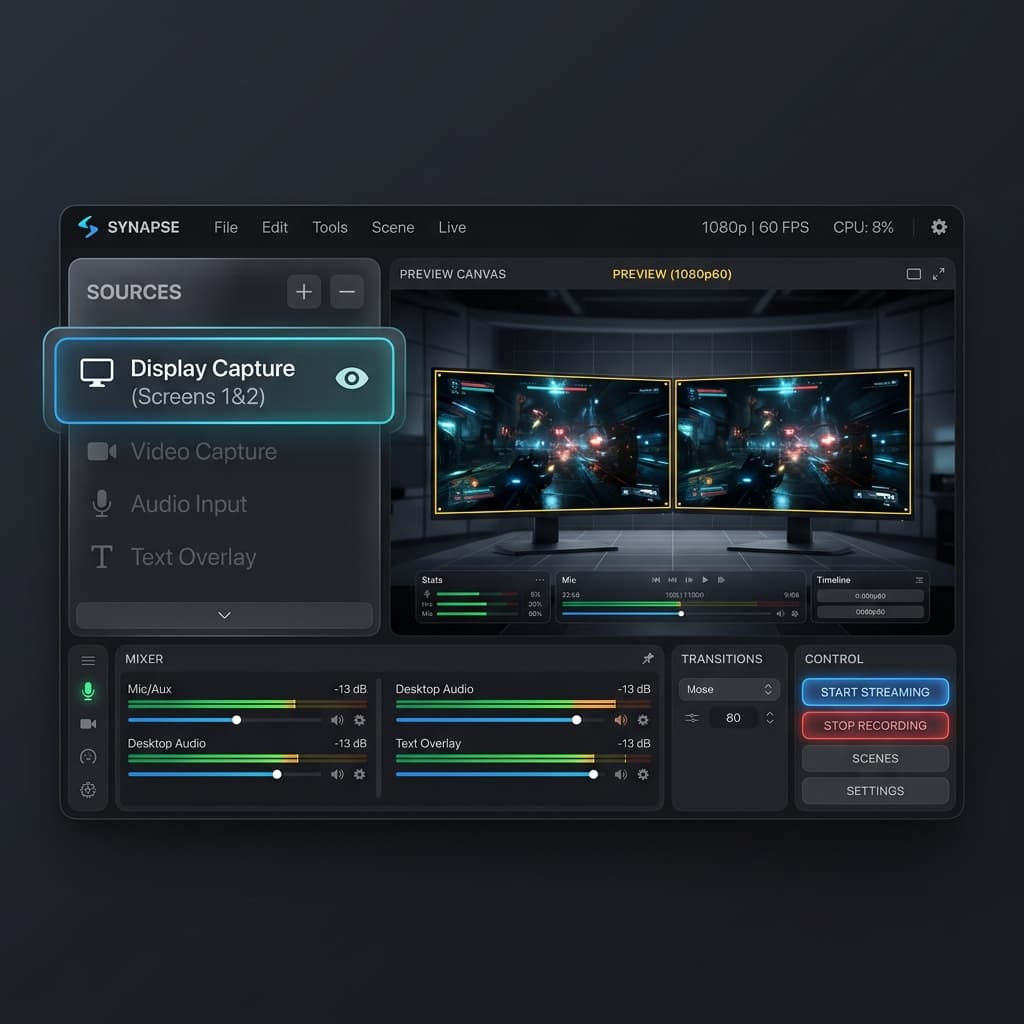
Method 3: OBS Studio — Display Capture
OBS is overkill for a quick screen recording, but if you already have it installed — or if you need to record a stream and a local file at the same time — it's the most flexible option for full-display capture.
Steps:
- Open OBS. You'll see the Scenes panel (bottom-left) and Sources panel (next to it).
- In Sources, click + and pick Display Capture. Give it a name.
- In the dialog, pick which display to capture from the Display dropdown. OBS lists them with resolution so you can tell them apart.
- Decide whether to show the cursor (checkbox at the bottom) and click OK.
- Resize the capture rectangle on the canvas to fill the OBS preview. Use Edit → Transform → Fit to Screen to snap it.
- In the Audio Mixer, make sure your mic and desktop audio levels are set.
- Hit Start Recording (bottom-right). To stop, hit Stop Recording.
Multi-display handling: OBS lets you add multiple Display Capture sources to a single scene. You can record both displays in one file by laying them side-by-side on the canvas and setting the base resolution to the sum of their widths. This is the only built-in way to get a synchronized multi-monitor recording, and it's the main reason serious tutorial creators keep OBS installed.
macOS Sonoma and later use the ScreenCaptureKit backend in OBS. On first run you'll be asked to grant Screen Recording permission — do it, then restart OBS or the capture will show as a black rectangle.
Notch behavior: OBS captures the full logical display, including the menu bar region. The notch appears as a black area at the top — OBS doesn't auto-crop it, so you'll need to either crop the source (right-click → Transform → Edit Transform → Crop) or accept the black gap.
Trade-offs:
- Steep learning curve for a simple task.
- No built-in editor — you stop recording and you're done, for better or worse.
- File sizes are large unless you tune the encoder.
- No cursor smoothing, no auto-zoom, no highlights.
Method 4: QuickTime Player — New Screen Recording
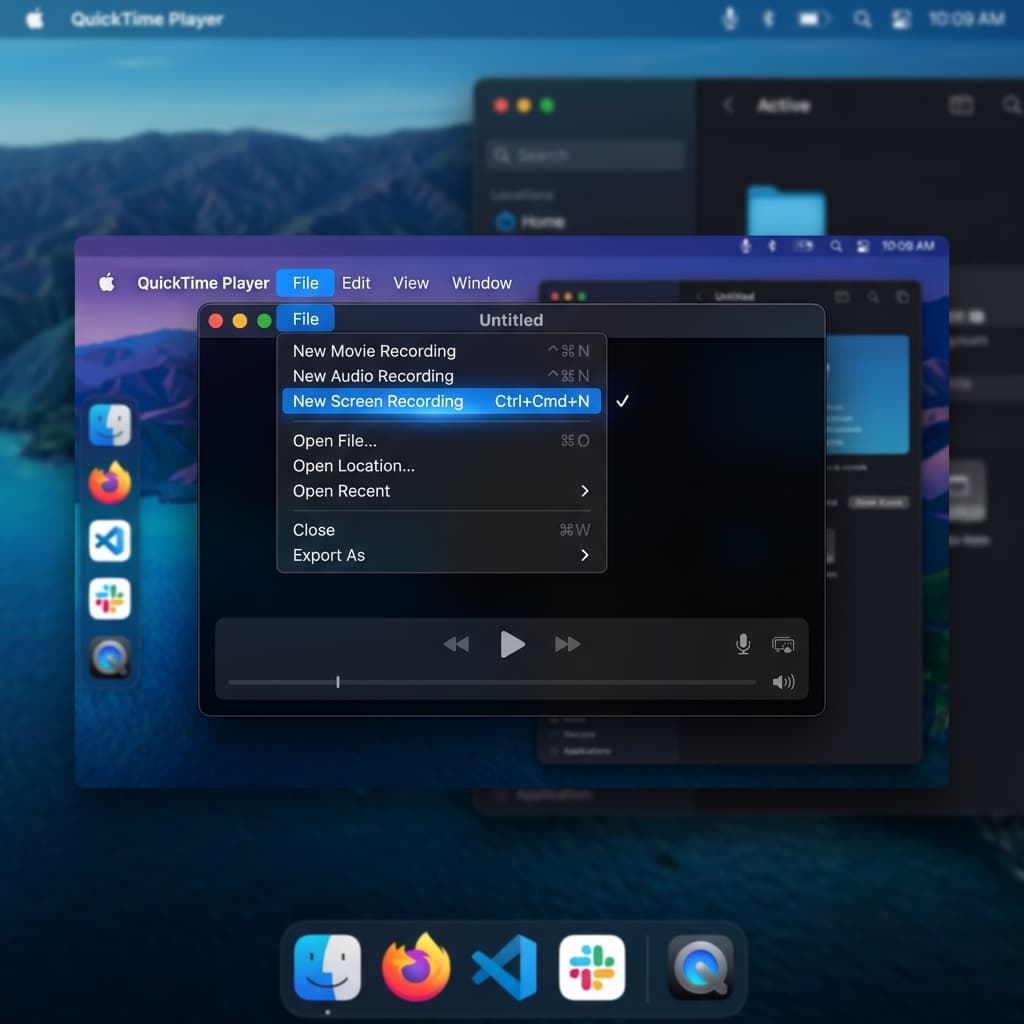
QuickTime Player has been the Mac's classic screen recorder since long before the Screenshot toolbar existed, and it still works. On modern macOS it actually delegates to the same Screenshot toolbar backend, but the launch path is different and sometimes more convenient.
Steps:
- Open QuickTime Player from Applications.
- From the menu bar, choose File → New Screen Recording.
- The Screenshot toolbar appears. Pick the entire-display recording icon.
- Set Options: save location, microphone (for voiceover), show clicks.
- Click the display you want to record, or hit Record in the floating strip.
- Stop from the menu bar icon when you're done. The clip opens directly in QuickTime Player for trimming.
Why anyone still uses this: the post-record flow is the main advantage. The file opens in an editor immediately, you can trim the head and tail, then File → Save sends it to disk. It's faster than hunting for the file in Finder.
Multi-display: same behavior as the Screenshot toolbar — pick one display per recording.
Notch: same as the Screenshot toolbar. Captured, with a black region where the notch hardware is.
QuickTime is a reasonable choice when you want to record-trim-save in one app and don't need anything fancy. For anything else, one of the other three tools will serve you better.
Start recording with Screenify Studio if you want auto-zoom and a shareable link instead of a raw file to edit.
Multi-Monitor Recording: What Each Tool Actually Does
Multi-display setups are where full-screen recording gets confusing. Here's the concrete behavior:
One display, one recording. Screenshot toolbar and QuickTime handle this by dimming every screen and letting you pick one. Screenify lets you pick from a named list with thumbnails. OBS uses the Display dropdown in the Display Capture source settings.
Both displays in one file. Only OBS does this natively by stacking two Display Capture sources on a wide canvas. Screenify can approximate it by recording each display separately and arranging them in a multi-track timeline afterward, but they won't be frame-perfectly synced unless you lined up an audio cue (a hand clap, a keystroke) at the start.
Switching displays mid-recording. None of these tools let you swap which display is being recorded on the fly. If you need to move between monitors, either record the whole desktop in OBS or start and stop separate clips.
Different resolutions and scaling. If one display is Retina 5K and the other is an old 1080p, recording both in one file means either scaling one up (blurry) or down (tiny). The cleanest solution is to record them separately and decide per-clip which viewers care about.
Recording across Mission Control spaces. When you switch spaces with Control-Arrow or a swipe, the display recording continues — macOS just shows the new space. This is useful for tutorials that span multiple full-screen apps. Note that on Ventura and later, transitions between spaces are slightly faster in the recording than they look in real time, which can feel jumpy.
The MacBook Pro Notch
On the 14" and 16" MacBook Pros, the display extends up around the camera notch. The menu bar lives in that top strip. When you record the full display, the operating system sends every pixel below the notch plus the two "ears" on either side. The notch hardware itself has no pixels, so the captured video gets a rectangular black area at the top center.
This catches people off guard the first time. Three options:
- Record only below the menu bar. Screenify Studio's "clean crop" mode does this automatically. In other tools, you'd capture full-screen and crop afterward.
- Use an external display for recording. If you plug in a monitor without a notch and record that display, the problem goes away.
- Accept it. For internal review clips, nobody cares about the notch.
If you're publishing to YouTube or a course, the clean-crop approach looks the most professional.
Full-Screen Apps vs Full Display
When you click the green traffic-light button in a Mac app, the app takes over its own Mission Control space. The menu bar auto-hides, the Dock auto-hides, and the app fills every available pixel. This is a different beast from a full-display recording.
All four tools above record full-screen apps correctly — because from macOS's perspective, it's just another desktop on that display. The difference is visual: your recording won't have a menu bar or Dock in it, because they're hidden.
Two things to watch for:
- Video players in full-screen mode. Some players (including parts of Safari's full-screen video) use protected output and appear as black in recordings. This is DRM doing its job — you can't work around it, and you shouldn't try.
- Presentation apps. Keynote's Play mode takes over all connected displays simultaneously. Recording with the built-in tools captures one display at a time, so you'll see the presenter view on one monitor and the slides on another — record whichever you want viewers to see.
Troubleshooting
Black rectangle instead of content. First-run permission issue. Open System Settings → Privacy & Security → Screen Recording, make sure your recording tool is checked, then quit and relaunch the tool. If you're trying to record a DRM-protected video, the black rectangle is intentional and nothing will fix it.
Cursor disappears from the recording. Happens when a display sleeps and wakes mid-capture, or when you're using certain third-party cursor apps. Check Options in the Screenshot toolbar for "Show Mouse Pointer," or the equivalent setting in your recorder. If you're using a custom cursor theme, try the system default.
DisplayLink adapters not showing up. DisplayLink USB-to-HDMI adapters use a virtual display driver that some recording tools can't see. macOS Sonoma improved this — DisplayLink Manager 1.10+ adds screen-recording compatibility — but older setups will capture a black frame. Update DisplayLink Manager, reboot, and check again. If it still fails, the workaround is to move what you're recording to the native display.
Sidecar (iPad as second display) not being captured. Sidecar creates a virtual display that's actually rendered on the iPad. Screenshot toolbar and QuickTime can see it and offer it as a recording target. OBS can too. Screenify sees it as a named display ("iPad"). However, the frame rate will match Sidecar's link, not your Mac's native refresh, so expect 30 fps rather than 60. For smoother results, mirror the iPad display instead of extending to it, or don't use Sidecar for the content you're recording.
Recording ends up scaled or pixelated. Happens when your recorder captures at the logical resolution instead of the native pixel grid. In Screenify Studio, set the output to "Native Retina" rather than "1x." In OBS, set the Display Capture's base resolution to the display's full pixel count (e.g., 3024×1964 for a 14" MacBook Pro).
Privacy: What You're Actually Broadcasting
Full-screen recordings are a minefield because they capture everything visible. Before you hit record:
- Notifications. Turn on Do Not Disturb or use a Focus mode. A Slack ping in the middle of a tutorial recording is the fastest way to re-record.
- Browser tabs. The tab bar shows every site you have open. If you're recording a browser window as part of a full-display capture, close or move anything you don't want viewers to see.
- Menu bar apps. Battery level, VPN status, Dropbox sync indicators, the name of your Wi-Fi network — all visible. The "hide menu bar" option in Screenify's full-screen mode is there for a reason.
- Dock badges. Unread email counts, message counts, and app update badges are all in the recording.
- Desktop wallpaper. If your wallpaper is a family photo, it's now in every tutorial.
- File names. If the desktop is visible for even a second, every filename is readable.
The Screenshot toolbar and QuickTime give you none of these guardrails. Screenify's full-screen mode has the "hide menu bar" toggle and a desktop cleanup reminder on first use. OBS gives you nothing but lets you crop the source afterward.
For recordings where you only need a piece of the screen rather than the whole thing, recording a specific area on Mac sidesteps most of these concerns entirely. And if you care about output resolution for a polished deliverable, recording in 4K on Mac covers which tools actually support native 4K output.
Try Screenify Studio — free, unlimited recordings
Auto-zoom, AI captions, dynamic backgrounds, and Metal-accelerated export.
FAQ
Can I record the entire Mac screen including the menu bar?
Yes. The Screenshot toolbar, QuickTime, and OBS all capture the menu bar as part of a full-display recording by default. Screenify Studio includes it unless you toggle "hide menu bar during recording," which auto-hides it before capture starts.
How do I record both my MacBook display and an external monitor in one video?
Only OBS does this natively with multiple Display Capture sources on one canvas. Everything else records one display per file. If you need both in a single clip and don't want OBS, record them separately and composite them afterward in iMovie or your editor of choice.
Why is there a black strip at the top of my MacBook Pro recording?
That's the notch area. The OS reports the display with the menu bar region on either side of the notch, but the notch itself has no pixels, so the recording gets a black rectangle there. Use Screenify Studio's clean-crop mode, or crop below the menu bar in post to remove it.
Does Screenify Studio capture system audio in full-screen mode?
Yes. System audio is a capture toggle independent of the visual mode, so you can record it alongside any full-screen capture without installing a loopback driver.
Can I record a Sidecar iPad display?
Yes — it shows up as an extra display in the Screenshot toolbar, QuickTime, OBS, and Screenify. Expect the recording frame rate to be capped at 30 fps because of how Sidecar streams to the iPad. Mirror the iPad or avoid it for high-frame-rate content.
What's the maximum length of a full-screen recording on Mac?
Technically unlimited — you're bounded by free disk space, not a time limit. The Screenshot toolbar and QuickTime have no cap. Screenify Studio has no cap on the free plan for local recordings. Multi-hour sessions at native Retina resolution can easily produce 20+ GB files, so keep an eye on available storage.
Will full-screen recording show my notifications?
Yes, unless you turn them off. Enable Do Not Disturb or a Focus mode before recording. Notifications from Messages, Mail, Slack, and calendar apps will otherwise appear in the final video.
Can I record a full-screen Safari video?
You can record the frame around it, but DRM-protected content (Netflix, Apple TV+, Disney+) appears as a black rectangle in every Mac recording tool because the OS blocks capture of protected streams. Non-DRM video — YouTube, Vimeo, self-hosted players — records normally.
Which Method to Pick
If you want a full-display recording you'll throw away in five minutes, use the Screenshot toolbar. If you want something you're going to share with a team, a client, or a YouTube audience, Screenify Studio's full-screen mode handles the notch, the menu bar, and the "everything is too small" problem in one pass. OBS is the answer when you need both displays in one file or you're already streaming. QuickTime is the answer when you want to trim immediately and move on.
The tools matter less than the prep. Turn on Do Not Disturb. Close the tabs. Hide the dock badges. Pick the right display. Then worry about which app you're using.
Try Screenify Studio free and record your first full-display clip in under a minute.
Try Screenify Studio
Record your screen with auto-zoom, AI captions, dynamic backgrounds, and Metal-accelerated export. Free plan, unlimited recordings.
Download Free


