Insert Video as a Timeline Segment
Import MP4 and MOV files as first-class timeline segments. Our latest update adds speed control, audio mixing, fit modes, and drag-and-drop for video imports.
We recently made images a first-class timeline segment. This update does the same for video — and the result is a timeline that can hold anything.
What You Can Do Now
Drop an MP4 or MOV file onto your project and it becomes a timeline segment indistinguishable from your screen recording in terms of how the editor treats it. Trim it. Speed it up. Add a zoom region over a specific moment. Apply a background, watermark, or 3D transform. Export it through the same Metal GPU pipeline. The imported video is not a special object with a reduced feature set — it's a full participant in your edit.
The Three-Source Timeline
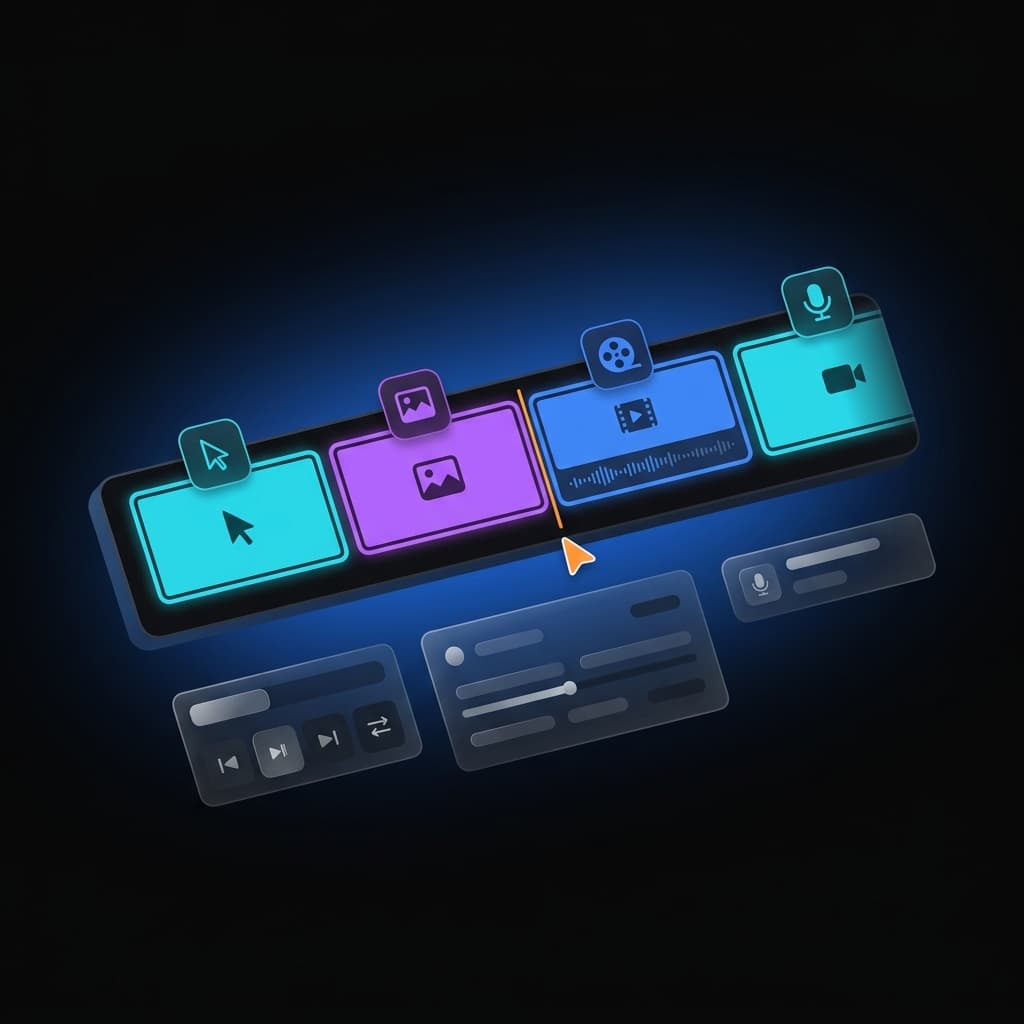
This update completes the multi-source timeline that we started with our image support. A project can now contain any combination of three segment types in any order:
- Screen recording (cyan) — live-captured display output with cursor, camera, and mic data
- Image (purple) — still slides, diagrams, title cards, recently added to the editor
- Imported video (blue) — external MP4/MOV files with their own audio track
Playback flows continuously across all three types. Music and voiceover tracks play uninterrupted. Effects applied at the project level — watermark, background — stay in place. No gaps, no transitions to configure.
How to Insert a Video
Click the + menu on the timeline toolbar and choose Video. A file picker opens filtered to .mp4, .mov, and .m4v. Select your file.
Screenify validates the clip before importing: H.264 and HEVC are supported; other codecs are rejected with a clear error. Files over 2 GB are rejected. Variable frame rate (VFR) video — including iPhone screen recordings — imports successfully with a brief warning that minor audio drift is possible.
The clip lands at the end of your timeline as a new segment. If the file has an audio track, Screenify extracts it to a separate file and attaches it automatically. The waveform appears on the clip immediately.
Drag-and-Drop from Finder
No menu required. Drag one or more files directly from Finder onto the editor and they append to the timeline in sequence. Images and videos in the same drop are handled correctly — each file goes to the right import path based on its extension.
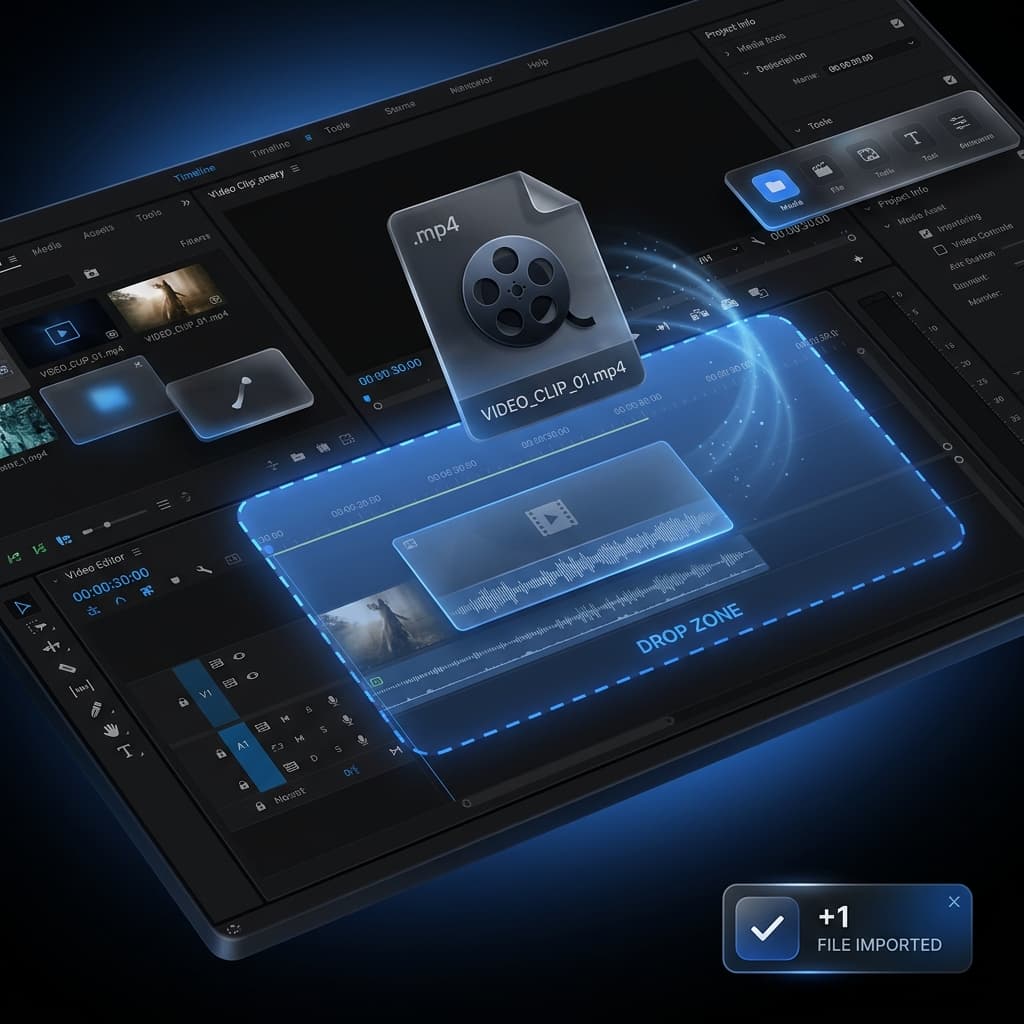
The drop zone appears as a blue-tinted overlay when you're mid-drag, so you always know where to release. A toast confirms how many files were added and skips unsupported types with a short explanation.
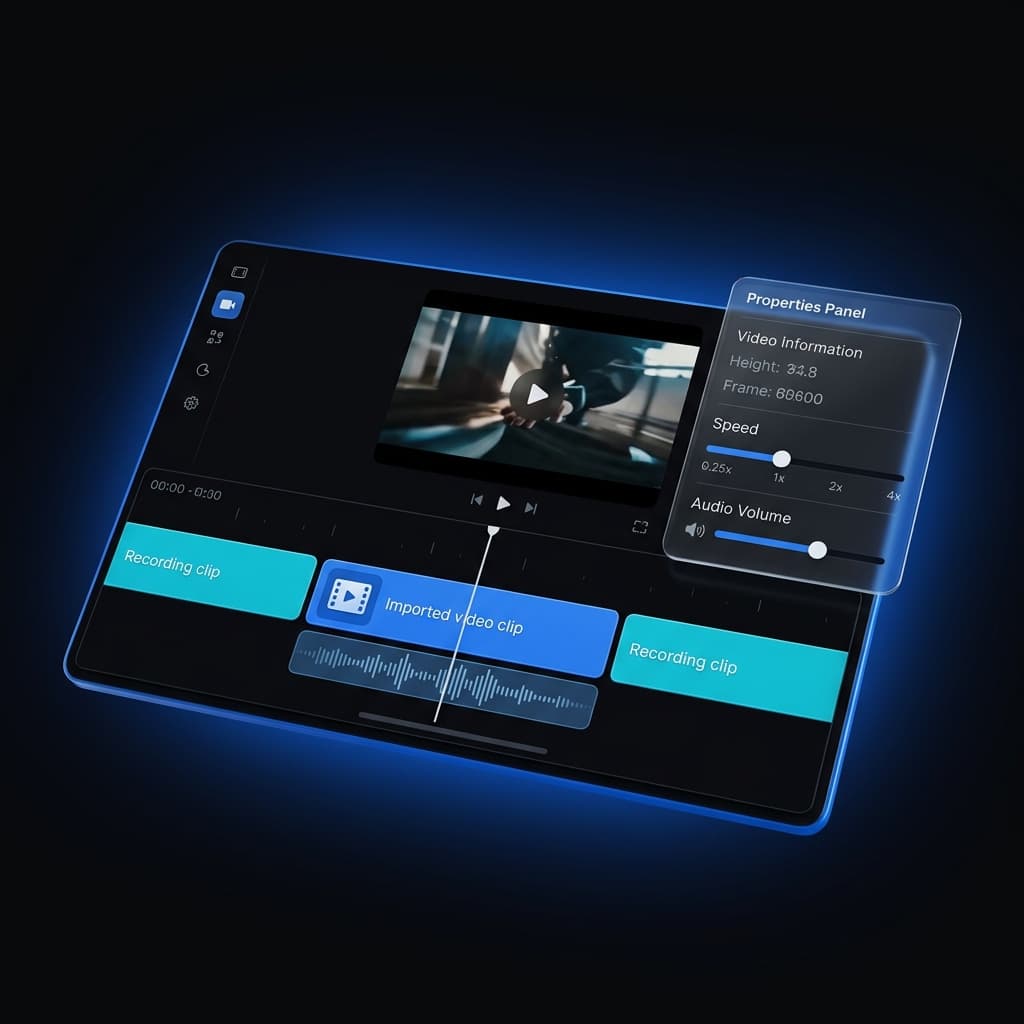
Properties Panel for Imported Video
Click an imported video segment to open its dedicated Properties Panel. It shows exactly what's relevant — nothing from the screen recording panel bleeds in.
| Control | What it does |
|---|---|
| Filename + duration | Source file name and total clip length |
| Speed | 0.25× 0.5× 1× 2× 4× buttons. Changes playback rate and shortens/extends the timeline segment accordingly |
| Audio volume | 0–200% slider. Only visible when the source file has audio |
| Mute | Silence the imported audio track for this segment without removing it |
| Seek to | Jump the playhead to the start of this segment |
| Delete | Remove the segment from the timeline |
Try Screenify Studio — free, unlimited recordings
Auto-zoom, AI captions, dynamic backgrounds, and Metal-accelerated export.
Audio: Extracted and Mixed Automatically
When an imported video has audio, Screenify extracts it to a separate .m4a file inside your project folder at import time. During playback and export, that extracted track plays through a dedicated audio element synced to the video.
During an imported video segment, microphone and system audio are automatically muted — there's no recording data for those sources to contribute. Background music continues without interruption. When playback returns to a screen recording segment, mic and system audio resume normally.
The volume slider and mute toggle in the Properties Panel control only the imported audio track, per-segment. You can have one imported video at full volume and another at 50%, independent of each other.
Fit Mode: Same as Images
Imported video clips support the same Contain / Cover / Fill fit modes recently introduced for images. If your imported clip has a different aspect ratio than your recording canvas, choose how it fills the frame. The setting is stored per-segment and applied identically in preview and export.
Speed Control
Speed is adjusted per-segment via the 0.25×, 0.5×, 1×, 2×, 4× buttons. The segment resizes on the timeline to reflect the new duration. A 10-second clip at 2× occupies 5 seconds of timeline. Trim handles respect the source duration so you can't trim past the source file's actual length.
All Track Effects Apply
Just like image segments, imported video segments participate fully in the track effect system. Zoom regions animate correctly over imported video frames. Callout bubbles and annotations display. Background color and padding apply. 3D transform and mask work. Watermark renders over every frame.
This isn't special-cased handling — imported video uses the same rendering pipeline as screen recordings, with the source pixel data coming from the imported file instead of the capture buffer.
Try Screenify Studio — free, unlimited recordings
Auto-zoom, AI captions, dynamic backgrounds, and Metal-accelerated export.
Export: Metal and Standard
Both export engines handle imported video fully. The Metal GPU renderer reads frames directly from the imported video file using AVAssetReader — the same infrastructure used for recording segments — and composites them with all applied effects. The standard software renderer uses an ffmpeg-based decoder with the same effect pipeline.
There's no quality difference between exporting a segment that was screen-recorded and one that was imported. Both go through the same compositing stack.
Codec Compatibility
Screenify accepts H.264 and HEVC (H.265) in MP4, MOV, and M4V containers. These cover the overwhelming majority of video files you'll encounter: iPhone recordings, DSLR footage, screen recordings from other apps, stock clips. If you drop in a file with an unsupported codec (ProRes, VP9, AV1), the import is rejected with a message identifying what was found and what's supported.
HEIC images and VFR video both import with automatic handling — HEIC converts to JPEG before import, and VFR gets an audio resync pass to minimize drift.
Our next focus is on trim handles and in-editor trimming for imported media segments. The data model already stores trim points — the next update will bring the drag-to-trim UI that makes non-destructive editing of imported clips as natural as working with recordings.
Download Screenify Studio and start building timelines that mix recordings, slides, and video without switching tools.
Try Screenify Studio
Record your screen with auto-zoom, AI captions, dynamic backgrounds, and Metal-accelerated export. Free plan, unlimited recordings.
Download Free


