Insert Image as a Timeline Segment
Insert images as first-class timeline segments in Screenify Studio. Add title cards, diagrams, and slides between clips — all track effects apply.
The most-requested timeline feature is here. Starting now, you can insert an image directly onto your recording timeline and treat it exactly like a recording segment — because that's what it is.
What "Insert Image" Actually Means
Most screen recording editors let you drop an image as a decoration on top of a clip. That's an overlay. That's not what this is.
In Screenify Studio, an inserted image is a first-class timeline segment. It occupies time on the timeline just like a recording clip does. Playback flows through it continuously. Every track effect — zoom, callout, annotation, background, padding, shadow, 3D transform, mask — applies to the image the same way it applies to your recording.
Think of it as inserting a slide into a video presentation: your demo is playing, you cut to a diagram, then you cut back to the demo. All in one continuous export.

How to Insert an Image
Open your project in the editor, then click the + menu on the timeline toolbar and choose Photo. A file picker opens — select any image (PNG, JPG, HEIC supported; HEIC is auto-converted to JPG before import).
The image lands at your playhead position as a 5-second segment. If the playhead is inside a recording clip, the recording is automatically split at that point — no manual slicing needed.
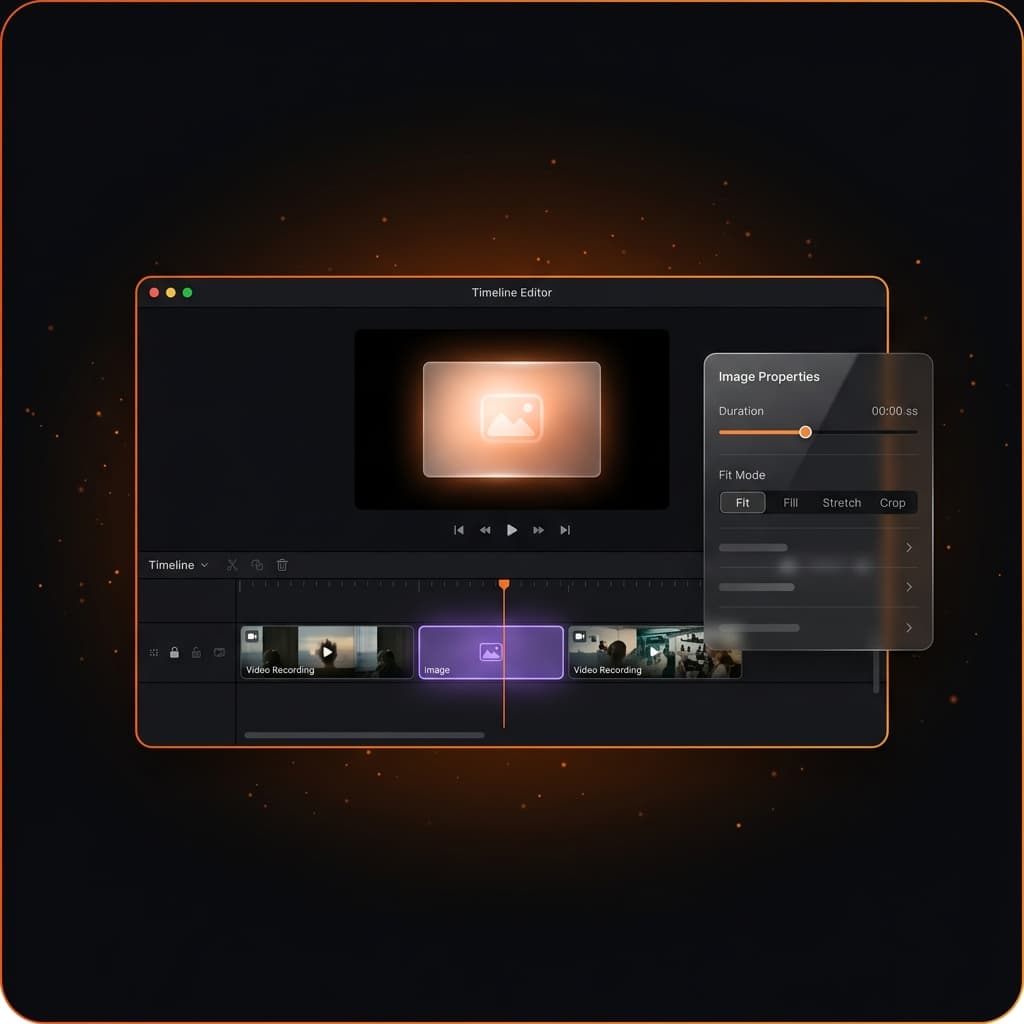
Properties Panel for Image Clips
Click the image segment on the timeline to open the Image Properties Panel. You'll find exactly the controls you'd expect:
| Control | What it does |
|---|---|
| Duration | Drag the slider or type a value (0.5 – 60 seconds). The segment resizes on the timeline instantly. |
| Fit Mode | Choose how the image fills the video frame: Contain, Cover, or Fill. |
| Source Info | Filename, pixel dimensions, and file size — read-only. |
| Replace Image | Swap the source file while keeping the segment's position, duration, and all applied effects. |
| Delete | Remove the segment with a confirmation prompt. |
Try Screenify Studio — free, unlimited recordings
Auto-zoom, AI captions, dynamic backgrounds, and Metal-accelerated export.
Fit Mode: Contain, Cover, Fill
Your recording canvas has a fixed resolution (typically 1920×1080 or whatever you set). Images rarely match that ratio exactly. Fit Mode controls what happens:

- Contain — The image scales to fit entirely inside the frame. Dark bars appear on the sides or top/bottom if the aspect ratios don't match. Great for diagrams and slides where cropping would lose content.
- Cover — The image scales to fill the entire frame, cropping the edges. Ideal for background-style images or photos where composition allows it.
- Fill — The image stretches to fill the frame exactly, ignoring the original aspect ratio. Use when you know the dimensions match, or for abstract textures where distortion is acceptable.
Fit mode is stored per-segment in your project file and applied identically in preview and export.
All Track Effects Apply — Without Any Changes
This is the part that required the most architectural work, but it's invisible to you as a user. Every effect you've added to other clips — auto-zoom regions, cursor spotlight, callout bubbles, annotations, background color, padding, shadow, 3D tilt, mask — applies to image segments with zero extra configuration.
You can, for example:
- Add a zoom region over part of a diagram to emphasize a detail
- Apply a background color to frame a transparent PNG
- Add a shadow and rounded corners via the padding/shadow controls
- Animate the image into 3D space using Transform3D
This works because image segments share the exact same rendering pipeline as recordings. The timeline effect hooks don't know or care whether the source is a video frame or a static image.
Music Continues Uninterrupted
Background music tracks don't pause at image boundaries. Playback time advances continuously through image segments using the system clock, so your music stays in sync across the full video — recording clips, image clips, and back to recordings — without any additional configuration.
Microphone audio, system audio, and camera overlay are automatically muted and hidden during image segments (since there's no recording data for those sources). They resume automatically when playback re-enters a recording segment.
Multiple Images, Any Order
You're not limited to one image. Insert as many as your project needs — title card at the start, a diagram in the middle, a before/after screenshot comparison, an outro card at the end. Each segment is independently configurable.
Try Screenify Studio — free, unlimited recordings
Auto-zoom, AI captions, dynamic backgrounds, and Metal-accelerated export.
Export: Metal and Standard
We are shipping full export support on both render paths. The Metal GPU renderer and the standard software renderer both handle image segments with complete parity — same effects, same output quality, no fallback modes or silent skips.
What's Coming Next
This update establishes the architectural foundation for importing any media as a timeline segment. Our next update builds on this exact same pattern to add imported video clips — drop a pre-recorded MP4 between your demo segments the same way you'd drop an image today.
Download Screenify Studio to try Insert Image in your next project.
Try Screenify Studio
Record your screen with auto-zoom, AI captions, dynamic backgrounds, and Metal-accelerated export. Free plan, unlimited recordings.
Download Free


