How to Schedule a Screen Recording on Mac
Schedule screen recordings on Mac to start automatically — Shortcuts, AppleScript, cron, and third-party tools compared.

You need your Mac to record something while you're not sitting in front of it. Maybe it's a webinar that starts at 3 AM your time, a recurring standup you'd rather review later, or an overnight stress test of a long-running process. The bad news: macOS has no built-in "schedule a recording" button anywhere in the system. The good news: there are at least five reliable ways to make it happen, and most of them are free.
This guide walks through every practical method to schedule an unattended screen recording on macOS, including the permission traps, the sleep problem, and how to make sure you actually have a usable file waiting for you in the morning.
Quick Comparison
| Method | Cost | Setup Time | Reliability | Best For |
|---|---|---|---|---|
| Shortcuts.app + Calendar | Free | 10 min | High | One-off scheduled webinars |
| AppleScript + launchd | Free | 30 min | High | Recurring unattended recordings |
| Screenify Studio | Free tier | 2 min | High | Polished captures you'll share |
| Keyboard Maestro / BTT | $36 / $22 | 15 min | Very high | Power users with complex triggers |
| cron + screencapture | Free | 15 min | Medium | Headless, scripted, long captures |
None of these methods bypass macOS's Screen Recording permission prompt. All of them need you to keep the Mac awake during the capture window. The differences come down to how you trigger the recording, how you stop it, and how the resulting file is named and stored.
Why Schedule a Screen Recording?
Scheduled recording is one of those features you don't need until you suddenly very much need it. A few scenarios where it earns its keep:
- Webinars at awkward hours. A product launch streams live from Berlin at 2 AM Pacific, replay not guaranteed. Schedule the capture, go to sleep, watch it at breakfast. If you record webinars often, the dedicated webinar recording guide covers audio routing in more depth.
- Recurring meetings. A daily standup you attend but don't need to be mentally present for. Auto-record, skim the transcript later.
- Live streams that don't offer downloads. Twitch VODs expire, YouTube premieres sometimes aren't archived, Zoom webinars without recording permission. See the live stream recording guide for the capture-side tradeoffs.
- Overnight monitoring. Watching a long-running build, a memory leak reproduce case, or a UI that intermittently glitches. You want visual evidence, not just logs.
- Unattended demos. A kiosk or trade-show display where you want a record of what attendees saw.
The shared constraint across all of these: you're not at the keyboard to hit record. Which means every piece of the pipeline — permissions, wake state, start trigger, stop trigger, file destination — has to be set up in advance and has to not fail silently.
The two gotchas that will ruin your morning
Before any method, two things will sabotage you if you don't plan for them:
1. Screen Recording permission must already be granted. macOS will not show a permission dialog to a script running at 3 AM. If the tool doing the recording hasn't been explicitly approved in System Settings → Privacy & Security → Screen Recording, the output file will either be blank, show only the wallpaper, or not exist at all. Test every method during the day first. Grant permission to whichever binary actually runs the capture — Shortcuts, QuickTime Player, osascript, screencapture, or your third-party app.
2. A sleeping Mac records nothing. If the display sleeps, the lid closes, or the system idles into standby, the capture stops cold. The fix is the caffeinate command:
caffeinate -d -i -s -t 3600-d prevents display sleep, -i prevents idle sleep, -s prevents system sleep on AC power, and -t 3600 sets a timeout of one hour. Run this alongside (or wrapped around) your recording command and the Mac will stay awake exactly as long as you need.
With those two out of the way, pick a method.
Method 1: Shortcuts.app + Calendar Trigger
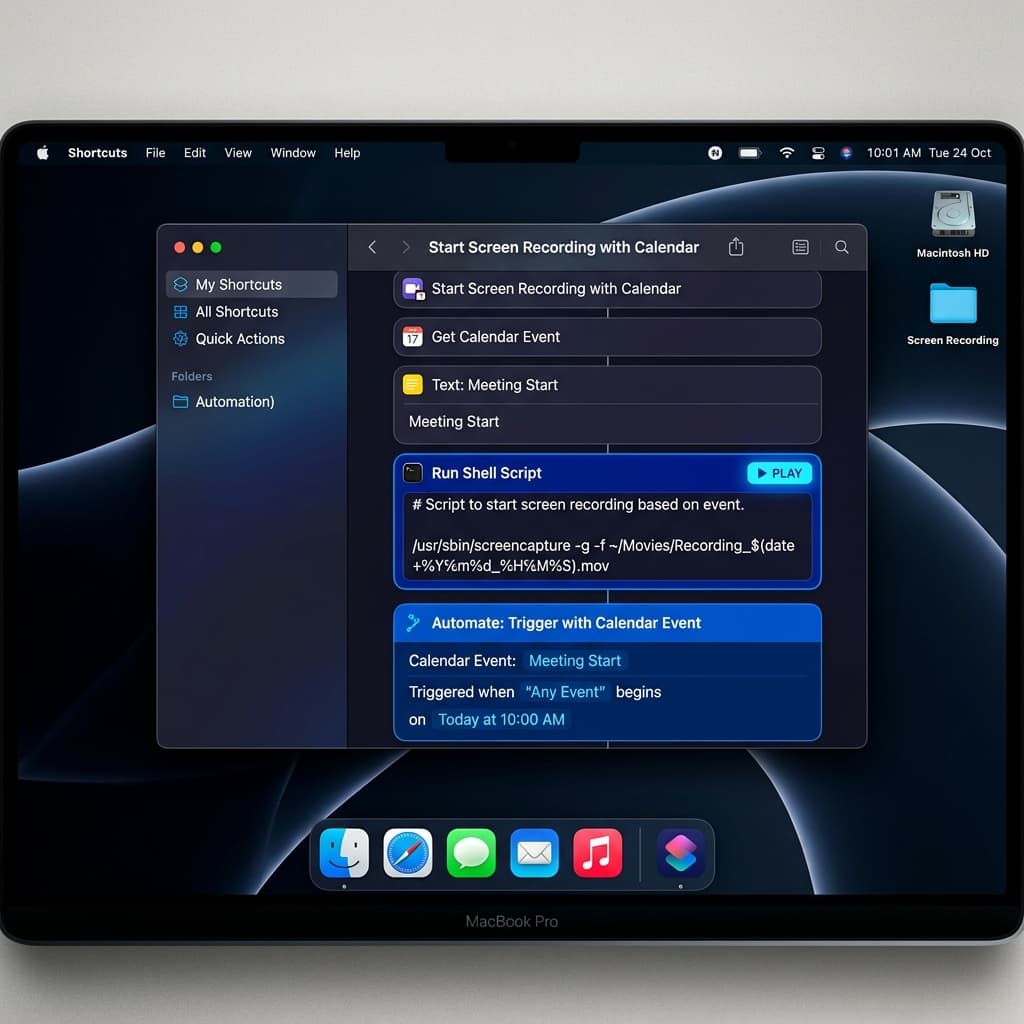
This is the cleanest native approach and the one to try first if you've never scheduled a recording before. Shortcuts can launch a screen recording via shell, and Calendar events can launch Shortcuts at a specific time.
Build the Shortcut
-
Open Shortcuts from Applications.
-
Click the + in the top bar to create a new Shortcut. Name it something like
Scheduled Recording. -
Add a Run Shell Script action from the action library.
-
Set the shell to
/bin/zshand paste:caffeinate -d -i -s -t 1800 & screencapture -V 1800 -v ~/Desktop/scheduled-$(date +%Y%m%d-%H%M).movThat records 1800 seconds (30 minutes) of the main display to a timestamped file on the Desktop, with
caffeinaterunning in the background to keep the system awake. -
Click the info panel on the right and tick Use as Quick Action → Services Menu off, and leave Pin in Menu Bar on if you want to run it manually for testing.
-
Run the Shortcut once by clicking the play button. macOS will prompt you to grant Screen Recording permission to Shortcuts — approve it in System Settings and rerun. You should see a fresh
.movfile appear on the Desktop.
Trigger it from Calendar
- Open Calendar and create a new event at the time you want recording to start.
- In the event details, set the Alert to Custom → Open file → Other → navigate to the Shortcut you just created (you can also drag the Shortcut from Shortcuts.app onto the event).
- Set the alert to fire At time of event (not 15 minutes before).
- Save. Repeat for recurring slots if needed.
The event fires, Shortcuts runs, screencapture starts. When the 1800-second timer ends, both processes exit and you have a file.
Watch out for: Calendar alerts only fire if Calendar is running. Add Calendar to Login Items so it relaunches after any reboot. And double-check that Focus modes aren't silencing alerts during the scheduled window — Do Not Disturb can suppress alert-based triggers on some macOS versions.
Method 2: AppleScript + launchd
For recurring or more controlled scheduling, launchd is the macOS-native cron replacement and pairs naturally with AppleScript. This method gives you the most control over QuickTime Player itself, including starting and stopping a real QuickTime screen recording (not just a raw screencapture file).
The AppleScript
Save this as ~/Scripts/record-screen.scpt (create the folder if needed):
tell application "QuickTime Player"
  activate
  set newRecording to new screen recording
  tell newRecording to start
  delay 600
  tell newRecording to stop
  set recordingFile to (path to desktop as text) & "recording-" & (do shell script "date +%Y%m%d-%H%M%S") & ".mov"
  save newRecording in file recordingFile
  close newRecording saving no
end tell
The delay 600 gives you a 10-minute recording. Adjust as needed. save ... in file writes the result to a timestamped file on the Desktop so each run produces a unique output.
Test it from Terminal first:
osascript ~/Scripts/record-screen.scptQuickTime will flash, a recording will start, and after the delay you should see the file land. Grant permissions when prompted — osascript itself may need Screen Recording permission the first time.
Wrap it in caffeinate
Create ~/Scripts/record-screen.sh:
#!/bin/zsh
caffeinate -d -i -s osascript ~/Scripts/record-screen.scpt
chmod +x ~/Scripts/record-screen.shThe launchd .plist
Create ~/Library/LaunchAgents/com.user.scheduledrecording.plist:
<?xml version="1.0" encoding="UTF-8"?>
<!DOCTYPE plist PUBLIC "-//Apple//DTD PLIST 1.0//EN"
 "http://www.apple.com/DTDs/PropertyList-1.0.dtd">
<plist version="1.0">
<dict>
  <key>Label</key>
  <string>com.user.scheduledrecording</string>
  <key>ProgramArguments</key>
  <array>
    <string>/Users/YOURNAME/Scripts/record-screen.sh</string>
  </array>
  <key>StartCalendarInterval</key>
  <dict>
    <key>Hour</key>
    <integer>3</integer>
    <key>Minute</key>
    <integer>0</integer>
  </dict>
  <key>StandardOutPath</key>
  <string>/tmp/scheduledrecording.log</string>
  <key>StandardErrorPath</key>
  <string>/tmp/scheduledrecording.err</string>
</dict>
</plist>
Replace YOURNAME with your home folder. Load it:
launchctl load ~/Library/LaunchAgents/com.user.scheduledrecording.plistThis fires at 3:00 AM every day. For multiple times, use a StartCalendarInterval array instead of a single dict. The StandardErrorPath log is essential — when something fails at 3 AM, the error file is how you find out why.
To unload: launchctl unload ~/Library/LaunchAgents/com.user.scheduledrecording.plist.
Watch out for: launchd runs scripts as your user, but GUI-dependent commands (like AppleScript against QuickTime) need your user session to be active. If you log out entirely, QuickTime can't launch. Stay logged in, even if locked.
Method 3: Screenify Studio
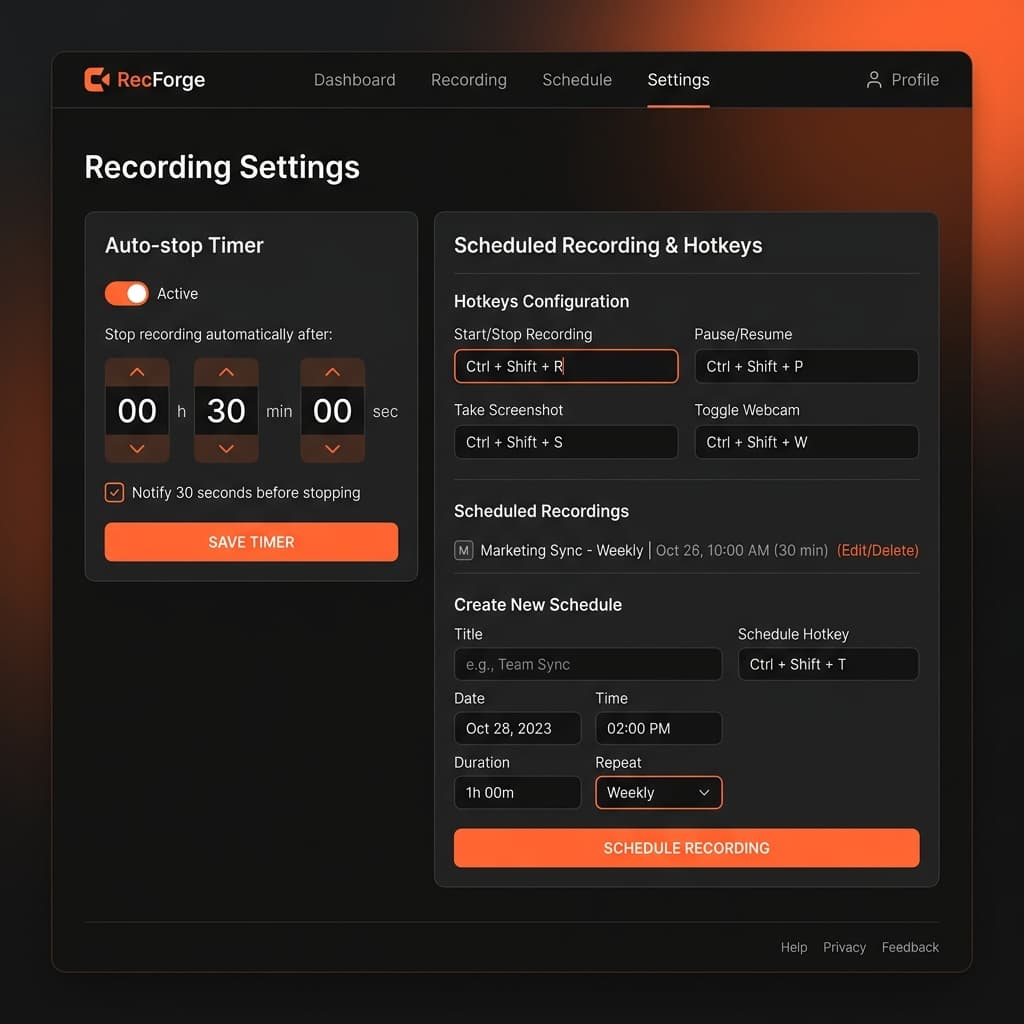
If you want the recording itself to look presentable rather than a raw QuickTime dump, Screenify Studio handles scheduled recording through its global hotkey plus a simple Shortcuts bridge — and the output is the same auto-zoomed, cursor-smoothed capture you'd get from a manual session.
The workflow:
- Set up a start/stop global hotkey in Screenify Studio preferences. If you haven't configured shortcuts yet, the keyboard shortcut guide covers the recommended bindings.
- In Shortcuts.app, create a new Shortcut with a Run Shell Script action that simulates the hotkey or calls Screenify's URL scheme.
- Trigger that Shortcut from a Calendar event (as in Method 1) or from launchd (as in Method 2).
What you gain over a raw screencapture: Screenify records at the display's native resolution, applies smart auto-zoom during editing so viewers can actually read text in the replay, and saves to a managed library rather than a random .mov on the Desktop. For a 3-hour overnight webinar replay where you want to skim only the key moments the next morning, the auto-zoom alone is worth the setup.
Other Screenify features that matter for unattended capture:
- Disk-space-aware stop. Long recordings can fill a drive. Screenify warns before a scheduled capture would exhaust free space.
- Crash recovery. If the app exits mid-recording, the in-progress file is recovered on next launch rather than lost.
- Named sessions. Each scheduled capture can carry a name tag, so you don't wake up to
Recording 47.mov,Recording 48.mov, etc.
Download Screenify Studio and grant Screen Recording permission once during daytime setup — that's the step most people forget before an overnight capture.
Try Screenify Studio — free, unlimited recordings
Auto-zoom, AI captions, dynamic backgrounds, and Metal-accelerated export.
Method 4: Keyboard Maestro or BetterTouchTool
If you already own one of these automation tools — or you want a GUI-first approach without writing AppleScript — they're the most reliable option for complex schedules.
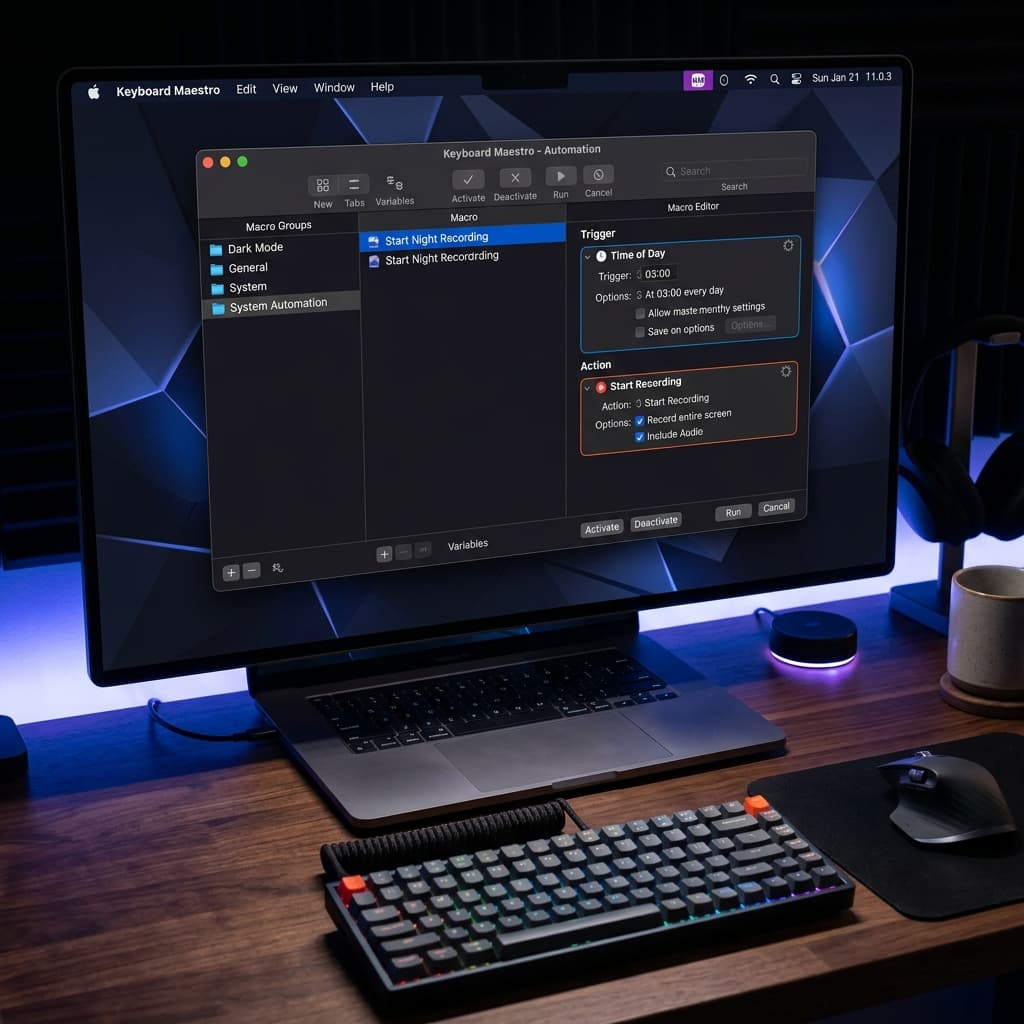
Keyboard Maestro ($36)
Keyboard Maestro has a native Time of Day trigger and a Periodic trigger, plus a Record Screen action and a Stop Recording action. The macro looks like:
- New macro → trigger: Time of Day: 03:00.
- Action: Execute Shell Script →
caffeinate -d -i -s -t 3700 & - Action: Start Recording (or Execute AppleScript calling QuickTime).
- Action: Pause → 3600 seconds.
- Action: Stop Recording.
- Action: Move or Rename File → timestamped destination.
Keyboard Maestro is the only tool on this list that handles conditional logic natively — e.g., "only record if external display is connected" or "skip this run if battery below 30%." That kind of guardrail is genuinely useful for automated captures running for weeks unattended.
BetterTouchTool ($22)
BetterTouchTool's Named Trigger system plus its Advanced Trigger Conditions can schedule recordings using system events. It's less schedule-focused than Keyboard Maestro but cheaper and extremely flexible if you're already using it for trackpad gestures. Use a Trigger at Time of Day + Execute Shell Script action with the same caffeinate + screencapture combo from Method 1.
Both tools are worth their price if you're going to schedule recordings regularly. For a one-time capture, Method 1 is enough.
Method 5: cron + screencapture CLI
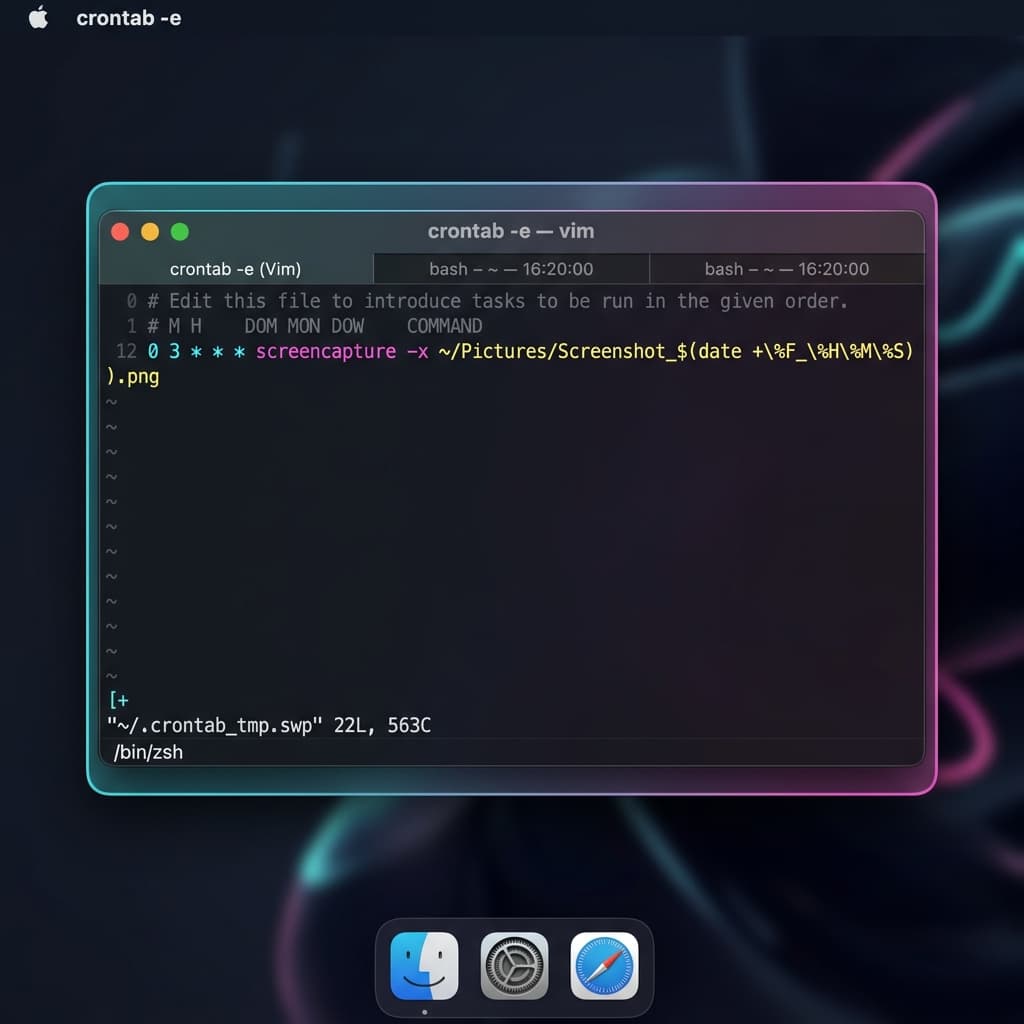
The old-school Unix approach. cron still works on macOS (though launchd is preferred), and screencapture is the most reliable CLI recorder available because it's an Apple binary that ships with every macOS install.
The screencapture command
screencapture -V 1800 -v ~/Desktop/capture-$(date +%F-%H%M).mov-V 1800 records video for 1800 seconds (30 minutes). -v writes to the specified video file. screencapture records the main display at native resolution, with no cursor effects, no audio by default, and no UI. Pure capture.
To include audio from a specific device:
screencapture -V 1800 -g -v ~/Desktop/capture-$(date +%F-%H%M).mov-g captures audio during video. Note that screencapture audio capture is limited to the default input — for system audio you'll still need a virtual audio device.
Wrap in a shell script
~/Scripts/cron-record.sh:
#!/bin/zsh
OUTPUT=~/Recordings/capture-$(date +%F-%H%M).mov
mkdir -p ~/Recordings
caffeinate -d -i -s -t 1830 screencapture -V 1800 -v "$OUTPUT"

# Optional: purge captures older than 7 days
find ~/Recordings -name "capture-*.mov" -mtime +7 -delete
The find ... -delete line is the piece most people skip and then regret a month later when ~/Recordings has 200GB of stale captures. Always include a retention policy for unattended recording.
The cron entry
crontab -eAdd:
0 3 * * * /Users/YOURNAME/Scripts/cron-record.sh >> /tmp/cron-record.log 2>&1Fires daily at 3:00 AM. The log redirect is non-optional — without it you'll have no way to diagnose failures.
Watch out for: cron jobs on macOS run outside of your GUI session and cannot prompt for permission. You must pre-grant Screen Recording permission to /usr/sbin/cron (find it under Privacy & Security → Screen Recording → click + → press ⌘⇧G → type /usr/sbin/cron). If you skip this step, cron-triggered captures will produce zero-byte or wallpaper-only files.
Download Screenify Studio if you want to skip the permission gymnastics — scheduled captures from Shortcuts run inside your user session and inherit your existing grants.
Troubleshooting
The recording file is empty or shows only the wallpaper
Screen Recording permission was not granted to the binary that ran the capture. Open System Settings → Privacy & Security → Screen Recording and verify an entry exists for whichever tool is doing the actual recording: Shortcuts, QuickTime Player, osascript, screencapture, cron, or your third-party automation app. Toggle it off and on once if it's already listed — macOS occasionally loses the grant after an update.
The Mac went to sleep halfway through
caffeinate wasn't running, or its -t timeout expired before the recording finished. Double-check that the caffeinate duration is at least 30 seconds longer than the recording duration. Also verify that Energy Saver isn't set to Put hard disks to sleep when possible on an older Intel Mac — that setting can interrupt long captures even with caffeinate active.
Calendar alert fired but nothing happened
Three common causes. First, Calendar.app wasn't running — add it to Login Items. Second, a Focus mode was active and suppressed the alert-triggered Shortcut. Third, the Shortcut itself needs a permission that hasn't been granted yet; run it manually once during the day to clear any pending prompts.
The output file has no audio even though I recorded audio
screencapture only captures the default input device and cannot capture system audio without a virtual audio driver like BlackHole. If you need to record audio playing from the Mac itself during an unattended session, set up a multi-output device in Audio MIDI Setup and make BlackHole the default input before the scheduled time.
The script works manually but fails from launchd or cron
Environment variable mismatch. launchd and cron run with a minimal environment — no $PATH, no $HOME in some cases. Always use absolute paths to every binary (/usr/sbin/screencapture, /usr/bin/caffeinate, /usr/bin/osascript) and absolute paths for output files. Check the log file you wired up earlier for the actual error.
Try Screenify Studio — free, unlimited recordings
Auto-zoom, AI captions, dynamic backgrounds, and Metal-accelerated export.
FAQ
Can I schedule a screen recording on Mac without installing anything?
Yes, using Method 1 (Shortcuts.app + Calendar) or Method 5 (cron + screencapture). Both rely only on tools that ship with macOS. Shortcuts is simpler to set up, cron is more reliable for headless recurring jobs.
Does macOS have a built-in way to schedule recordings?
No. There's no "schedule recording" option in Screenshot toolbar, QuickTime Player, or System Settings. Every method in this guide is a workaround that combines a scheduler (Calendar, launchd, cron, Keyboard Maestro) with a recorder (screencapture, QuickTime, a third-party app).
Will my Mac record if the lid is closed?
Only if you have an external display connected and the lid-closed clamshell mode is active. Otherwise, closing the lid triggers display sleep and the capture stops. For unattended overnight recordings on a laptop, leave the lid open and rely on caffeinate -d to prevent display sleep.
How do I stop a scheduled recording early?
Depends on the method. For QuickTime-based recordings (Method 2, Method 3), press the configured stop hotkey or click the menu bar icon. For screencapture -V, the recording stops automatically at the duration you specified — there's no clean early-stop, though killall screencapture will terminate it and usually produces a playable file. For Keyboard Maestro, cancel the running macro from the status menu.
How long can a scheduled recording be?
Technically unlimited, practically bounded by disk space. A 1080p QuickTime screen recording runs roughly 1–2 GB per hour. An 8-hour overnight capture at 1080p will consume 8–16 GB. Always check free space before scheduling long captures, and include a retention/cleanup step (find ... -mtime +N -delete) in your scripts.
Can I schedule a recording of a specific window instead of the full screen?
screencapture -V only supports full-display or interactive region selection — not scripted window targeting. For window-specific scheduled capture, use AppleScript to focus the target window before starting a QuickTime recording, or use Screenify Studio's window mode combined with a scheduled hotkey trigger.
Do I need admin rights to set up scheduled recordings?
No. Every method in this guide runs as a normal user. Screen Recording permission is per-user and doesn't require admin approval on a personal Mac. On managed/corporate machines, Screen Recording may be locked by MDM — check with IT before relying on unattended capture for work.
What happens if the recording app crashes at 4 AM?
Depends on the recorder. Raw screencapture -V writes a partial but playable .mov if killed. QuickTime Player leaves an unsaved in-memory recording that's lost if the process dies. Screenify Studio recovers in-progress captures on next launch. For critical unattended work, Method 5 (screencapture) is the most crash-resistant because the OS binary almost never fails silently.
Scheduled recording on macOS is a patchwork — no single feature, but five reliable paths depending on your needs. For a one-time 3 AM webinar capture, Method 1 with Shortcuts and Calendar takes ten minutes to set up. For recurring unattended jobs, launchd with AppleScript or cron with screencapture is worth the extra effort. And for captures you actually plan to share afterward, let a dedicated recorder handle the polish while you focus on the trigger logic.
Download Screenify Studio to try the scheduled recording workflow with auto-zoom and crash recovery baked in, or stay on the native tools — both paths will have a file waiting for you in the morning.
Try Screenify Studio
Record your screen with auto-zoom, AI captions, dynamic backgrounds, and Metal-accelerated export. Free plan, unlimited recordings.
Download Free


